
Editorial photography is all about storytelling with pictures. It means creating images that go alongside articles in magazines, newspapers, or online publications, rather than just selling a product.
In other words, editorial photos help illustrate a story or mood. As one expert puts it, what makes editorial work different from advertising is “an element of storytelling” in each shot.
For photographers who love creative freedom, editorial style photography is perfect. Editors and writers often hire photographers to visually support a written piece, so images can be candid or posed, as long as they match the article’s mood.
Editorial photographers focus on capturing genuine moments or artistic poses that fit a theme. They always keep the narrative in mind during the shoot. For example, if the story is about summer fashion, a photographer might have the model express joy and movement in bright sunlight.
The goal is to “evoke a feeling” that ties to the story. Notice the model above striking a natural pose under the sky – this kind of expressive shot helps the story come alive. In short, editorial images let you use creative tools to bring a concept or emotion to life.
What Is Editorial Photography?
Put simply, editorial photography is about telling a story or conveying a concept through images. These photos usually appear in magazines, newspapers, and online features. Unlike product ads, editorial pictures rely more on a narrative than a brand message.

For instance, a magazine article on a musician might include editorial portraits showing the artist in thoughtful or dramatic scenes, rather than just album covers. The motive is to express and engage, not to push sales.
Editorial work can cover many subjects. You might shoot portraits, fashion, food, travel, or even events in an editorial style. In fact, “any subject can be photographed in an editorial style,” according to Adobe’s guide.
One model might pose in an elaborate gown for a fashion editorial, while another shot might capture a chef cooking in a kitchen for a food story. The key is how you compose and light the scene to match the article’s mood, not the topic itself.
Editorial vs. Other Styles: Editorial photography is often confused with photojournalism or commercial photography, but there are clear differences. In photojournalism, the goal is strict truth and news reporting.
Editorial, on the other hand, lets the photographer be more artistic and less bound by reality; you can direct a scene or take creative liberties with lighting because you’re supporting a feature story, not just documenting breaking news. And compared to commercial photography, editorial images are less about selling a product and more about telling a story.
Editorial vs. Commercial Photography
It helps to know how editorial photography differs from commercial (advertising) photography. Here are some key points of editorial photography and commercial photography:

- Purpose: Editorial photos tell a story or set a mood, while commercial photos aim to sell or promote a product or brand. For example, an editorial shoot in a magazine will illustrate an article, whereas a commercial shoot might show a model posing with a specific handbag to drive sales.
- Client: In editorial work, the client is usually a magazine editor or publication. For commercial jobs, the client is typically a company or brand. Editorial photographers often pitch or submit portfolios to editors, while commercial photographers may work through agencies or have direct brand contacts.
- Creative Freedom: Editorial photographers generally have more creative freedom. They can experiment with style, lighting, and composition to make the story engaging. In contrast, commercial photographers usually must follow the client’s brand guidelines and vision.
- Ownership and Licensing: When shooting editorial, photographers often retain ownership of their images. Magazines may request exclusive usage for a time, but the photographer can later resell or reuse those images (for example, as stock photography). For commercial work, the company often owns the photos (buyout or work-for-hire), and usage rights are tightly controlled.
Here’s a quick comparison table:
- Goal: Editorial tells a story; Commercial sells a product.
- Client: Editorial client is a publisher/editor; Commercial client is a brand/company.
- Creative Control: Editorial gives the photographer storytelling freedom; Commercial follows the client’s direction.
- Usage: Editorial images usually have editorial use only (no ads without releases); Commercial images are used in ads, packaging, etc.
- Releases: Commercial shoots must have model/property releases for people or logos; Editorial shoots can run without releases because they’re not selling, but any logos or recognizable brands in the shot mean it must remain editorial-use only.
Legal note: Remember, if you want to use an editorial photo in an advertisement, you must obtain signed model releases (and property releases for any private locations or branded products). Without legal permission, those images are restricted to editorial publications only.
Types of Editorial Shoots and Style
Editorial photography can take many forms. Here are a few common types:
Editorial Fashion Photography:
These are like photo essays for clothing magazines. it is another type of photography. A fashion editorial will often be a multi-page spread that tells a story through style.

The photos may have models in styled clothes, and each image stands on its own, but ties into the overall theme. Fashion editorials give the photographer and stylist a lot of creative freedom to experiment with poses, environments, and narrative.
Lifestyle Editorials:

These images illustrate lifestyle articles (like travel, home, food, culture). For example, a travel editorial might show people enjoying a local market, or a food piece might feature a chef in the kitchen. The focus is on capturing real moments or carefully arranged scenes that fit the story.
Portrait Editorials:
Editorial portraits might highlight a person’s story or personality. In a profile article, the photographer might capture the subject in an environment that reflects their work or hobbies. The photographer can work with the subject to portray a mood or character.
Documentary/News Features:
Sometimes, editorial photography blends with documentary style. For instance, a magazine article about an event could have editorial shots that are more candid (though still composed with feeling).
No matter the genre, the key is consistency in style. For a given editorial project, your images should have a similar look (color tone, lighting, mood) that fits the narrative. Whether it’s a high-contrast black-and-white look for a gritty urban story or soft pastel tones for a romantic piece, keep a unified aesthetic throughout.
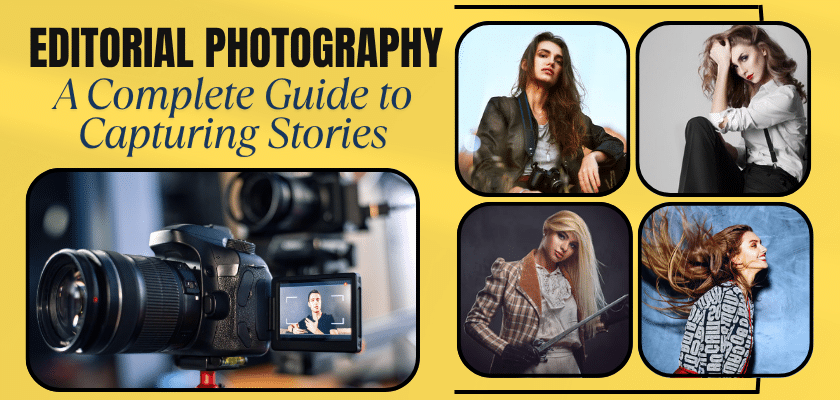
Fashion editorials often use vivid colors and staging. The image above shows three models posed together in a coordinated style – a typical fashion editorial setup. Notice how their expressions and body language tell something about their mood or story. This kind of group shot can appear in magazines like Vogue or Elle, illustrating a story about friendship or a new clothing line.
Some tips on editorial style: focus on mood, not just clarity. For example, a magazine might want a slightly “imperfect” look (like a bit of film grain or natural light flare) to feel more authentic. You can also use creative angles and compositions (shooting from above or framing through objects) to add interest. Think like a visual storyteller: every detail in the frame should support the article’s theme.
Planning an Editorial Photoshoot
Great editorial photography starts long before pressing the shutter. Planning is essential. Follow these steps to prepare:
Concept & Story:
First, decide the story or concept you want to tell. What emotion or message should the images convey? Is it a fun slice-of-life piece, a serious profile, or a bold fashion story?
StudioBinder notes that in editorial shoots, the story “becomes the blueprint” for the entire shoot. Jot down your ideas or find inspiration from existing articles.
Research:
Learn about the subject and context. Talk to the writer or editor to understand the article’s angle. Ask questions like: What’s the article about? Who or what is featured?
What tone does it have – serious, playful, inspiring?. Also research how similar stories have been shot before; see what works and what new twist you can bring.
Moodboard:
Create a visual moodboard. Collect photos that capture the colors, lighting, and emotions you want. This could include other editorials, artwork, or anything that inspires you.
A moodboard helps align everyone’s vision – the photographer, stylist, client, and model. (Print it or have it on hand during the shoot so everyone can see it.) As Adobe’s guide says, moodboards translate your ideas and show the preferred color palette and style.
Team and Talent:
Assemble the right team. You might need a stylist, makeup artist, or assistant. If your editorial involves people (models, actors, etc.), make sure to cast carefully. Talk through your concept in advance so talent knows how to pose or express the theme.
Location and Props:
Scout a location that fits the story. It could be a studio, a street corner, a café, or anywhere relevant. Gather any props or wardrobe needed to tell the story. The details make the scene believable.
Equipment and Gear:
Plan your gear. Editorial photographers often pack a mix of cameras and lenses to adapt to different shots. (A full-frame DSLR or mirrorless body and one or two prime lenses – for example, 45mm, 75mm – are common tools.
Also bring lighting and reflectors if needed. Keep your setup simple and portable so you can be flexible on the job.)
Logistics & Releases:
Take care of paperwork and schedules. Book the location in advance. If you hire models or use someone’s private space, get signed model releases or property releases. These legal forms allow you to publish the images.
Your contract should also clarify who gets credit and usage rights. Release forms protect both you and your client by defining how the photos can be used.
Shot List:
Make a rough shot list or plan. Note must-have shots (e.g. “wide establishing shot of cafe”, “close-up of subject reading”). This helps you cover all angles on shoot day while staying creative.
Taking the time to plan means your editorial shoot will run smoothly. As one photographer advises, always over-prepare before the safe route: it’s better to have big ideas on the table and pull back if needed than to run out of inspiration.
Shoot Time:
On the Day: Shooting Editorial Photography
When the shoot day arrives, it’s showtime. Here are practical tips to keep in mind:
Keep the Story Front and Center.
During the shoot, don’t lose sight of the narrative. Each image should serve the story. As Amanda Lopez reminds us, a good editorial photo “should feel personal to the story”.
Start with your shot list, but feel free to explore off-script moments that capture the right emotion. If the story is about joy, encourage the model to laugh or dance; if it’s about introspection, try a moody portrait. Always evaluate: Does this shot fit the theme? If yes, it could be a keeper.
Respect Your Team and Subjects.
Editorial photography is as much about people as about images. Be friendly and respectful on set – with models, stylists, and everyone involved. Remember, you’re a guest in people’s space, and collaborators trust you with their ideas.
A polite and open attitude helps subjects feel comfortable, which leads to more natural, powerful photos. A stressed or rude photographer can ruin the mood and the story.
Develop Your Style.
While keeping the story in mind, also let your unique style shine. Every editorial photographer has an aesthetic – maybe you prefer bold colors, or high-contrast light, or whimsical setups. Don’t be afraid to experiment.
For example, try shooting from unusual angles or using creative lighting. As one photographer notes, experimenting with “bright, bold” versus “dark, dramatic” vibes can help you find a signature look. The image above shows an energetic pose and bright colors, hinting at a fun, carefree editorial. Find what makes your work stand out and use it consistently across the shoot.
Be Flexible.
Things rarely go 100% as planned. Equipment malfunctions, weather changes, or last-minute edits to the creative brief might happen.
Stay adaptable. If a model is uncomfortable with one pose, change it; if the location looks different at noon than in the morning, adjust your lighting. Good editorial photographers expect the unexpected and adjust the plan on the fly. Sometimes the best shots come from improvising when the story takes a new turn.
Focus on Emotion and Detail.
Rather than just capturing static poses, look for feeling in every shot. Encourage slight movements – a breeze in the hair, a laugh, a thoughtful gaze.
Watch the scene around your subject and include details that add to the story (like props or background items). Keep an eye on composition: rule of thirds, leading lines, and framing can make a simple shot more compelling.
After each setup, review your images briefly. Make sure the mood is right. It’s easier to fix things on location than in post.
But don’t over-shoot – quality over quantity. And remember to smile! A happy, confident photographer helps the team relax and be creative.
Post-Processing and Final Touches
Editorial images usually require careful editing. Treat post-production as part of your storytelling:
- Maintain Consistency: Apply similar color grading or filters to all images in the series so the story has a unified look. If one photo is warm and golden, another should not be cold and blue, unless that contrast is intentional.
- Enhance the Story: Use editing tools (e.g. Photoshop, Lightroom) to emphasize the mood. For instance, increase contrast for a dramatic piece, or soften tones for a dreamy story.
- Clean Up Distractions: Remove any stray objects that don’t belong (trash cans, unwanted light reflections) with tools like the healing brush. This keeps the focus on your subject and story.
- Sharpen and Refine: Make sure details you want visible (like a model’s eyes or product textures) are sharp. But remember – it’s okay to have some softness if it suits the style.
- Export in the Right Formats: Save high-resolution images for print and appropriate web sizes for online. Check the publication’s requirements for color space and file type.
In short, use post-processing to complete the vision. It’s part of the editorial flow: you’ve told the story on set, now finalize it in editing.
Legal and Usage Basics
Before you publish editorial images, be aware of these legal points:
- Model and Property Releases: If you have signed releases, your images can be used commercially. If no release is signed, the photos are strictly for editorial (journalistic or feature) use only. For example, a photo of a person taken without a model release can appear in a news article about them, but you cannot turn that photo into an advertisement.
- Branded Products and Logos: Any recognizable logo or product brand in your shot also restricts usage. Without a property release from the brand, the image must remain editorial only. So if you’re photographing at a store, be careful of visible trademarks.
- Copyright and Credit: As a photographer, make sure your work is properly credited. Magazines will typically give photo credits (like “Photo by [Your Name]”) if it’s published. Keep copies of invoices or contracts that show the rights and usage agreed upon.
- Editorial License: Often, publications will buy an editorial license for your images. This means they can use your photos for a set time in their magazine or website. After the contract expires, you may still license the same images elsewhere (for example, to stock agencies) because you usually keep the copyright.
Being cautious with releases and rights protects you and respects the law. When in doubt, get the proper paperwork signed before the shoot.
Getting Started as an Editorial Photographer
Breaking into editorial photography takes persistence and networking. Build a portfolio focused on storytelling images, and follow these steps:
- Brainstorm Story Ideas: Think of interesting subjects or concepts you’re passionate about. Write down a few story ideas and gather visual inspiration for each.
- Research Publications: Look at magazines or blogs that match your story’s style. See if your idea fills a gap or offers a new angle compared to what’s been covered.
- Craft Your Pitch: Refine your story idea into a short, clear pitch. Practice explaining it in one or two sentences. Editors are busy, so a concise “elevator pitch” is key.
- Identify Outlets: Start with smaller or local publications if you’re new. Find editors or art directors for those magazines. Email them directly or use submission platforms. A targeted list of outlets increases your chances.
- Prepare Your Portfolio: Have a few of your best editorial-style images ready, either on a website or in a digital portfolio. Include a tear sheet or sample if you’ve done any published work. This shows you’ve shot stories before.
- Estimate a Budget: Even for an editorial, it’s smart to outline costs (equipment rental, talent, location, time). Editors might ask for a budget proposal, or you’ll use it to negotiate assignments. Know your rates.
- Pitch Your Idea: Send a brief, polite email to the editor. Hook them with your subject line and summarize your idea in a few lines. Offer to send more details or meet to discuss. Attach a couple of relevant portfolio images.
By following these steps, you act like a professional photographer. Remember, persistence pays off. Not every pitch will succeed, but each one is a chance to improve your approach.
Further Resources
Editorial photography is a rich field, and there’s always more to learn. Check out photography blogs and communities for inspiration. Websites like Edublogs often feature creative photography, articles, and student projects.
Stock photo sites (such as Alamy) can show examples of editorial images and explain usage rules. Educational sites like QC Makeup Academy sometimes cover styling and creative shoots that tie into editorial work. Even browsing behind-the-scenes articles on fashion or art websites can give you ideas on how professionals set up their shoots.
Every shoot is a learning experience. As you practice editorial photography, focus on refining your unique voice and storytelling skills. Over time, you’ll find it one of the most rewarding ways to capture the world through your lens.