
Have you ever wanted to move something from a picture to a different background? Photoshop makes this possible. It might seem not very easy, but it’s simple. This blog will guide you, step by step, on removing a white background from any picture in Photoshop.
Why do we need to remove a white background from an image?
White backgrounds in images are super helpful for lots of different projects. When you make a background transparent, you can put that image on top of any other background. This is handy because you can automatically choose backgrounds that change colors or designs. Imagine you’re making a website for phones, tablets, and computers. If the image backgrounds are transparent, they will blend in. You won’t need to adjust them to fit different screen sizes.
This flexibility is just one key reason to use transparent backgrounds. There are many reasons. Images with transparent backgrounds can improve your projects. They will look better and work more smoothly. Transparent backgrounds help your images fit perfectly anywhere. They are useful for web design, presentations, and art.
Remove the white Background from an Image using Photoshop.
There are various types of tools in Photoshop that can remove white backgrounds, like the Pen tool, Magic Wand tool, Quick Selection tool, and Alpha Channel Masks. The pen tool is one of the most incredible and flexible tools for removing the backgrounds from an image. The process is called clipping path which is made by a powerful pen tool. A clipping path is needed when you want to remove the image background.
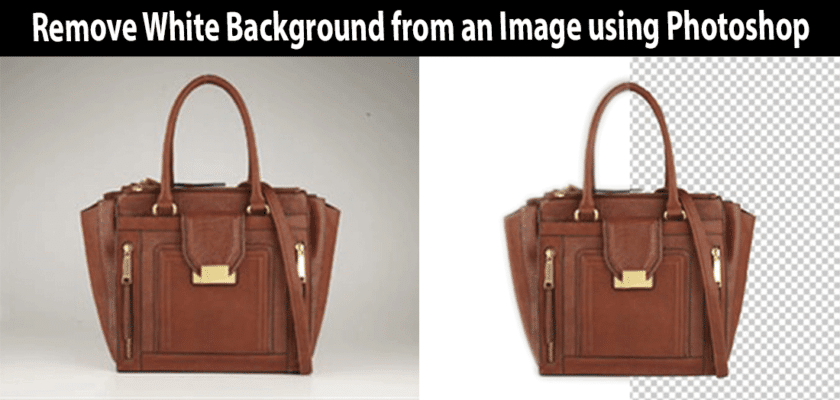
It’s not a complicated task for Photoshop experts to process the clipping path around the image and remove the white background. An appropriate clipping path depends on how much time you spend with the pen tool in Photoshop. So, the more you practice with the pen tool, the easier you will do the task. Let’s try to take an idea from the example image of removing the background, which is given below:
How to remove white background from an image In Adobe Photoshop Video Tutorials Given Bellow
Removing Image background using clipping path process in Photoshop
Here, I will give the basic steps for removing the white background using the clipping path process in Photoshop CS6. Run Photoshop CS6 on your computer and follow the below steps:
Step 01: Open The image in Photoshop and set up other options correctly.
- First, Open an image you want to use in Photoshop for your clipping path. Go to the File menu in Photoshop, select Open As, and click there. You will see an open dialogue box. Then, choose the file and click open.

- Go to the left tools Box and Pen tool from there. When you pick the tool, the mouse cursor will change to a like pen, and from below tools palette, select the Rubber Band.

- Now you can zoom the image for the best quality, but I think zoom level 300 is preferable.
Step 02: Create a Clipping Path to Remove Background
- Click on the image edge and start the clipping path process by dragging your mouse pointer with the Peen tool. Step by step, draw the clipping path around the image at an appropriate distance.

2. Then, when it’s almost done, you should close the path with the start point with the endpoint, and after completing the clipping path around the image, recheck it to ensure that it is appropriately done.

Step 03: Remove the white Background of the Image
1. Now see the Path palette, and Here is a Path with the name of “work path.” Then double-click on the “work path,” and when opening a box, click on the ok option to save the path.

2. Now go to the Path Palette upper right side “pop up” menu and select the clipping Path option. Click there. A box will open and set Flatness 0.50 Px. Click on the OK to activate the Paths.

3. After following these steps, then click ctrl+Path 1 for the selection and give a feather 0.5 by pressing ctrl+alt+D button.

4. Now click ctrl+J to create a new Layer 1 and close the eye of Background, and it’s now seen in the transparent background on the screen. Therefore, the clipping path process removes the white background of an image.

5. Then you can make your image background white or any other color using the Layers box below manure to create a new fill or adjustment layer option.

Remove White Background
6. Finally, it is time to save the processing image. Go to the File menu and click on the ‘save as’ and you will find a box. Select the format in which you want to save the image. After selecting the format, press on ‘Ok’.

Remove the White backgreound
The benefit of removing the white background
Removing the white background from pictures can be very helpful. This is true if you like to create designs or make things look perfect. Here are some reasons why it’s a great idea:
- Versatility in Design: Removing a picture’s white background lets you overlay it on other images or backgrounds. There will be no messy lines or mismatched colors. It’s like having a sticker that you can stick anywhere!
- Focus on the Subject: Without the background, whatever is left in the picture (like a person, animal, or toy) will catch your eye more. This means people will look right at what you want them to see.
- Professional Appearance: Pictures without backgrounds look cleaner and more professional. They’re like the cool graphics in video games and on websites.
- Layering Capability: You can put one picture on top of another without any weird edges showing. It’s great for making collages or art projects where you want things to look like they belong together.
- Flexibility Across Different Media: Once the background is gone, you can use the same picture in many places, like on a poster, in a book, or on a website. It will always look good.
- Ease of Customization: If you want to change the main part of the picture or add some cool effects, it’s easier if you don’t have to worry about the background.
- Better Printing: Printing pictures without a white background might save ink. It can save money if you’re printing a lot for school projects or crafts.
Removing the white background is like a magic wand. It makes your pictures ready for any project or idea.
Conclusion
Removing backgrounds in Photoshop isn’t that hard, after all. It’s like magic but even cooler if you are an expert; the more you practice, the better you’ll get. So go ahead, grab your favorite pictures, and start experimenting. The possibilities are endless.