
Clear or blurry images depend on pixels. Image resolution defines quality in digital and print media. High resolution gives sharp details. Low resolution, however, leads to blurriness. Understanding this is key for capturing, editing, and displaying images. It ensures the best quality. Mastering resolution improves your visual content across platforms. Always optimize your photos for the best clarity.In this article, we learn about image resolution from the beginning.
Table Of Contents
How to Check the Resolution of an Image
Why is image resolution important?
Best Resolution for Printing
Printer Resolution: What It Is and Why It Matters
Common Issues with Low-Resolution
How to Find High-Resolution Images Online
understanding DPI
Resizing Images for better display
Photo Sizes for Printing
Average Photo Size: Digital vs. Print
Must have to know about image resolution
Conclusion:
FAQ:
What is Image Resolution?

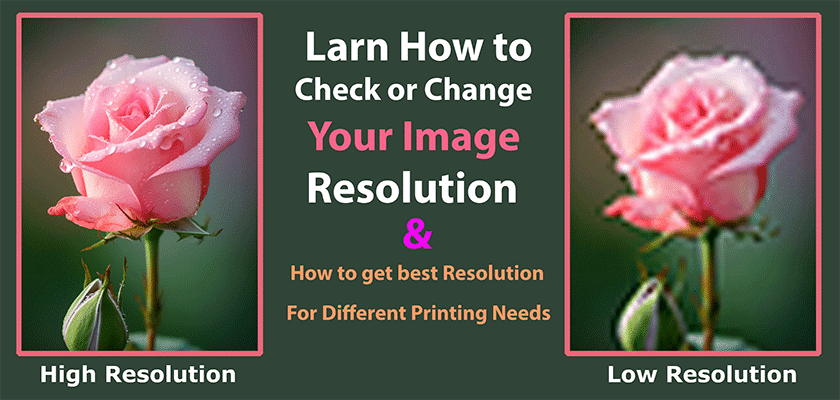
Image resolution measures detail in images, usually in pixels per inch (PPI) or dots per inch (DPI). It’s like a dot: more pieces (or pixels) mean a clearer picture. For instance, a high-resolution landscape image shows details, making it lifelike. In contrast, a low-resolution image looks blurry or pixelated, lacking clarity. For example, newspapers typically print at 150-300 DPI. Meanwhile, professional studios can capture images at 4000 DPI or more.
How to Check the Resolution of an Image
Using Operating System Features
1. Windows:

On Windows, find an image’s resolution quickly. Right-click the file and choose ‘Properties’. Navigate to the ‘Details’ tab. Look for ‘Dimensions’ to see the resolution displayed.
2. Mac:

To find an image’s resolution, right-click its file and choose ‘Get Info’. Under ‘More Info’, locate ‘Dimensions’ for the exact pixel count.
Using Image Editing Software
Adobe Photoshop:

Launch Photoshop and load your image. Navigate to the top menu and select ‘Image’, then ‘Image Size’. A pop-up window will display the resolution details of your opened file.
GIMP :

Launch GIMP and load your image. Navigate to the top menu’s ‘Image’ option, then click ‘Scale Image’. A window displays the image’s dimensions in pixels, revealing its current width and height.
Online Tools:

Upload your picture to IMGonline, PicResize, or ImageResizer.com. These web-based tools offer a quick, convenient way to check image specs without cluttering your device. Perfect for occasional use or tech-light users.
Why is image resolution important?
Image resolution matters in digital media and printing for several reasons:
- Clarity and Detail: More pixels mean sharper images. This is crucial for high-definition displays and prints.
- Professional Quality: Fields like graphic design and photography demand high resolution. It ensures images are clear and professional. Low resolution leads to blurry images.
- Scalability: High-resolution images can be sized up without losing quality. This is ideal for billboards and packaging.
- Printing Needs: Resolution is key for print clarity. High-resolution images avoid pixelation, ensuring clear prints.
- User Experience: In digital media, high-resolution images are more appealing. They keep users engaged, especially on websites and in apps.
Using the right resolution is important. It keeps images clear and meets their intended purpose.
Best Resolution for Printing
The resolution of a printed image is its pixel density. More pixels make the image sharper and more detailed. However, the needed resolution varies. It depends on the viewing distance and printing method.
- Viewing Distance: Images for distant viewing can have lower PPI and still look sharp. However, close-viewed images need a higher PPI for clear details.
- Printing Method: Printing techniques dictate resolution needs. Inkjet and digital presses require different PPI levels for best results. Each method’s traits determine the needed image sharpness, affecting print quality and clarity.
Understanding PPI (Pixels Per Inch)
Knowing PPI, or pixels per inch, is important for printing images. PPI measures digital image resolution. It indicates how many pixels fit in one inch. This metric is crucial. It directly impacts print quality. A higher PPI usually means sharper, more detailed images.
Recommended PPI for Different Printing Needs
To get the best print quality, adjust the PPI for the specific printing needs.
- Small Format Printing: This printing demands high precision. A resolution of 300 PPI ensures clear, sharp images. Such quality is crucial for close viewing. It highlights every detail, keeping the artwork’s integrity intact in smaller formats.
- Large Format Printing: Large prints need fewer pixels. From a distance, they look good with just 150 to 200 PPI. This method keeps files small and visually appealing. It balances size and clarity, making a big impact with low technical demands.
- High-Detail Printing: Fine art or high-quality photo prints need a PPI of 300 to 600. This high resolution captures and reproduces even the smallest details accurately.
Choosing the right PPI is crucial for beautiful prints. Experts say it impacts sharpness and quality. For photographers, artists, and print lovers, understanding resolution is key. Always consider viewing distance and print needs when setting PPI. The right choice makes your work look professional.
Printer Resolution: What It Is and Why It Matters
Tiny ink dots create prints. More dots mean sharper images. Each dot, like in pointillist art, adds to the whole. The higher resolution makes photos and designs vivid. These tiny marks decide quality, turning images into art.
Standard DPI for Printed Work:
DPI means “dots per inch.” It shows how many ink dots a printer can place in an inch. Usually, 300 DPI is enough for printing. However, for clear, detailed images, 600 DPI or more is better.
Resolution for Printing:
Choosing the right print resolution prevents blurriness or pixelation in our images. A low resolution leads to poor-quality prints. So, choosing the right resolution for each item is key for the best outcome. This involves checking the DPI to ensure it meets our needs for clear, sharp prints.
Common Issues with Low-Resolution
- Impact of Low Resolution on Logos and Branding
A low-resolution logo can damage a brand’s image. It’s the company’s face. If it appears blurry or unclear, the company seems less professional and trustworthy. This is crucial today, as we see logos everywhere—on websites, business cards, and products. Conversely, a sharp, high-quality logo creates a good first impression and makes a brand stand out.
- Pixel Distortion and Its Effects on Web Images
Pixel distortion occurs when an image lacks enough pixels for its web size. This makes the image appear blurry or blocky. It’s similar to stretching a small blanket over a large bed; it just doesn’t cover well. This issue can make websites look unprofessional. It also frustrates users, especially when viewing detailed images or reading text in images.
3. Fixing Low-Resolution Logos: Solutions and Tips
A low-resolution logo can harm a business online. Yet, there are ways to fix it:
- Redesign or recreate: Sometimes, starting over is best. This allows for better colors and design. For instance, Pepsi updated its logo in 2008 to fit digital needs.
- Use vector graphics: These graphics stay clear when resized. Converting logos to SVG or EPS formats keeps quality. The Nike swoosh is a prime example; it looks great on any screen.
- Professional software: Tools like Adobe Illustrator boost logo resolution. Designers can adjust elements to ensure quality everywhere.
By addressing low-resolution logos, businesses can better showcase their brand online. A logo is more than an image; it’s a company’s representative.
Tools for Fixing Resolution Issues
Resolution problems can make images look blurry. This is a big issue when printing posters or uploading photos. Luckily, several tools can fix these problems and ensure images look good on all devices.
- Adobe Photoshop: This is the top choice for photo editors. It has a ‘Preserve Details’ feature for upscaling images. This keeps clarity and prevents pixelation. It’s perfect for photographers and designers needing precise edits.
- GIMP: This free program is both versatile and easy to use. It allows users to adjust image resolution easily. Beginners find it accessible, while experts enjoy its advanced features. GIMP is ideal for both hobbyists and professionals.
- Online tools: For those who prefer not to install software, tools like Pixlr or ResizeImage.net offer quick solutions. These websites allow easy image resizing, perfect for social media, blogs, or online shops.
Using these tools, you can adjust settings to either enlarge or reduce images. Always check the resolution first to ensure the best quality. This step is crucial to avoid blurry or distorted images.
How to Find High-Resolution Images Online
Are you frustrated with low-quality images? Do you need better ones for a project? Finding high-resolution images online is easy with the right methods.
Use Image Search Engines Well: Sites like Google Images, Bing, and TinEye help find better versions of images. Simply upload your low-res image and search by image. This often leads to higher-quality results. You can also filter results by size.
Check Stock Photo Sites: Websites like Shutterstock, Adobe Stock, and Envato offer many high-res images. Even if you don’t find the exact match, you might discover better options. Search using keywords, categories, or colors.
Contact Creators Directly: If possible, reach out to the image creator on platforms like Envato or social media. They might share a higher-resolution version or guide you. Don’t hesitate to ask. Building these connections can lead to future opportunities.
By following these tips, you’ll easily find the high-resolution image you need.
understanding DPI
DPI stands for “Dots Per Inch.” It measures how many dots fit in an inch (2.54 cm) for printing or video. For monitors, DPI indicates display resolution, affecting image and text clarity. In printing, it shows how many ink dots are placed per inch, impacting quality and detail. DPI ensures digital images and designs appear precisely on screens and in prints.
How to Find the DPI of an Image
Knowing an image’s DPI (Dots Per Inch) is key for quality. This matters for graphic designers and photographers alike. So, how do you find it?
Quick Method: Check Image Properties On a computer, it’s simple. Right-click the image, select ‘Properties’, then ‘Details’. You’ll see the DPI there. No special software needed.
Detailed Method: Use Photo Editing Software For more info, use software like Adobe Photoshop. Open the image, then go to ‘Image’ and ‘Image Size’. Here, you’ll find the DPI, resolution, and size.
Convenient Method: Use Online Tools Don’t have photo editing software? No problem. Websites like Get-Metadata.com offer a quick solution. Just upload your image, and it shows the DPI, file size, format, and camera settings.
Using these methods, you can find an image’s DPI and ensure it’s fit for your needs.
Converting 300 DPI to Pixels for Quality Images
Knowing how to convert DPI to pixels is key for resizing images without losing quality. This is vital for graphic designers and photographers. It’s for anyone wanting to display their photos well. It helps keep the clarity and detail in images. Imagine capturing tiny details, like a leaf’s texture, the sparkle in an eye, or a sunset’s gradient. Converting DPI to pixels makes this possible.
First, understand DPI (dots per inch) and pixels. DPI measures print resolution. Pixels measure digital resolution. The conversion is simple:
- Formula: Pixels = DPI × Inches
Let’s see this in action. Take a 4×6 inch photo for 300 DPI printing. Calculate the pixels needed: 300 DPI × 4 inches = 1200 pixels, and 300 DPI × 6 inches = 1800 pixels. So, you need an image of 1200 by 1800 pixels for a sharp print.
This guide helps you easily raise image resolution for any project, be it print or digital. It’s crucial for business materials like brochures, flyers, or catalogs where quality matters. Social media posts and keepsakes benefit. They let you share memories in detail. With this skill, you can create stunning results that captivate and inspire.
Resizing Images for better display
Correctly resizing images is key for social media, logos, and banners. A wrongly sized logo can look blurry, hurting a brand. In contrast, a well-sized image improves user experience.
Here’s how to resize images in Adobe Photoshop to 300×300 or 150×150 pixels:
Steps:
- Open Photoshop: Start Adobe Photoshop and load your image, whether it’s a photo, drawing, or design.
- Find Resize Tool: Click ‘Image’ in the top menu, then select ‘Image Size.’ This opens the resizing window.
- Set Dimensions: Enter your desired size in the width and height fields. For instance, type 300 for a 300×300 image, or 150 for a 150×150 image.
- Keep Proportions: Ensure the ‘Constrain Aspect Ratio’ is checked. This keeps your image from stretching or squishing.
- Save Changes: Click ‘OK.’ Your image is now ready to use.
Why Large Images Matter (3000×3000 Pixels)
Images that are 3000×3000 pixels are vital in visual media. They fulfill the high demands for resolution in printing. Such images keep prints clear and detailed, crucial for billboards and posters. This clarity is key for advertisers, artists, and designers who want to leave a mark.
In digital art and photography, high-res images enable detailed edits without quality loss. Artists can refine their work. Photographers catch details missed in low-res images.
For magazines and journals, big images guarantee sharp visuals. This is essential for those that tell stories through images. High-resolution images draw readers in and make content more appealing.
Keeping Quality When Shrinking Logos to 150×150 Pixels
Shrinking a logo to 150×150 pixels can blur its details. Yet, quality is key for brand identity. Here are tips to keep it sharp:
- Start with a High-Res Logo: Use the best-resolution logo. The original file is ideal. For example, if made in Adobe Illustrator, use the .ai file.
- Use Vector Files: Choose vector files (.ai, .eps) for resizing. They maintain quality at any size.
- Pick the Right Format: Save in high-quality formats like PNG. PNGs support transparency and don’t lose quality. Avoid JPEGs for logos. They’re better for photos.
- Check the DPI: For print, ensure at least 300 dpi. This guarantees clarity on business cards and billboards.
Follow these tips to resize logos without losing quality, be it for digital or print. Your logo will look sharp everywhere, from apps to billboards.
Photo Sizes for Printing
People often use standard sizes for printing photos. These sizes fit well in albums and frames, and are easy to share. The right size matters. Common sizes include:
- 4×6 inches: This is the most popular size. It’s perfect for albums and small frames. It’s easy to store and share.
- 5×7 inches: This size is slightly larger. It’s often used for portraits. It offers a more dramatic look without being too big.
- 8×10 inches: This size is great for walls or desks. It showcases landscapes, events, or art beautifully.
Choosing the Right Size for Photo Printing
Picking the right size depends on a few key factors:
- Purpose: Consider where the photo will go. Different uses need different sizes.
- Image Quality: Ensure the image is high enough in resolution. Low-resolution images can become blurry when enlarged.
- Available Space: Measure the space first. This ensures the photo fits well. The right size keeps everything in balance.
Average Photo Size: Digital vs. Print
Photo sizes differ greatly between digital and print. This is due to each medium’s unique needs.
- Digital Media: Digital photos are often larger for better screen resolution. A typical size is 1920×1080 pixels. This ensures clear images on modern devices. Smaller images may look blurry or pixelated on high-resolution screens.
- Print Media: Print photos focus on physical sizes, like 4×6 or 5×7 inches. Resolution matters too, measured in dots per inch (DPI). A minimum of 300 DPI is best for clarity. This ensures detailed images that capture subtle features.
Knowing these differences helps you create better prints from digital images. Whether making a family album or decorating, choosing the right size is key. By considering the needs of digital and print media, your photos will look their best.
Must have to know about image resolution
Photocopy Enlargement and Resolution
When you enlarge an image on a photocopier, you also increase the size of each pixel. This can make the image less sharp and clear, a problem called resolution degradation. For example, a small, clear image, when doubled in size, shows its pixels more clearly. It might then look blurry or pixelated. This happens because the copier has to add extra pixels. They may not match the original image well.
Unusual Image Dimensions: 300 x 5 Pixels
Using unusual image sizes, like 300 x 5 pixels, can harm an image’s quality. Such sizes stretch or compress the image too much, making it unrecognizable. This aspect ratio is impractical. It causes display and printing problems. The image’s skewed proportions fail to convey information.
How to Find the Resolution of a Photoshop Document (PSD)
To find a Photoshop document’s resolution, check its pixel dimensions and DPI (dots per inch). DPI affects print size. Here’s how:
- Open your PSD in Photoshop.
- Go to Image > Image Size.
- You’ll see pixel dimensions and DPI. DPI shows pixels per inch, vital for print size and quality.
For example, a 1500×1500 pixel image at 300 DPI prints at 5×5 inches without losing quality.
Resolution of Screenshots and Megapixels
A screenshot’s resolution matches the screen’s. For example, a 1920×1080 pixel screen (Full HD) produces a screenshot at the same resolution. To find the megapixels:
- Multiply the width by height: 1920 x 1080 = 2,073,600 pixels.
- Divide by one million to convert to megapixels: 2,073,600 / 1,000,000 = 2.07 megapixels.
So, a Full HD screenshot is about 2.07 megapixels. This is good for online sharing but may not be enough for high-quality prints.
These topics will help you manage and edit images. You’ll get the best results in digital or print media.
Conclusion:
Knowing image resolution is crucial for quality pictures online and in print. Use these tips to make your images shine, whether on screens, in prints, or for branding. So, dive in and tweak your images for better clarity and sharpness!
FAQ:
What are the challenges with low-resolution images from Envato?
Upscaling vs. Downscaling: What's the Difference?
Upscaling can harm quality. It adds more pixels than the original, similar to stretching a painting. This often leads to blurry or pixelated images.
In contrast, downscaling usually maintains sharpness. It removes unnecessary pixels, akin to cropping. This method keeps quality, which is ideal for social media or websites.
For example, consider a billboard. Upscaling a low-resolution image for it might blur the image. However, downscaling a high-resolution image for a smaller screen keeps it clear.
What Does 300 dpi mean?
How to make a photo 300 x 300 pixels?
- Open the image in software like Adobe Photoshop, GIMP, or an online tool like Pixlr.
- Find the “Image Size” or “Resize” option in the menu.
- Set both width and height to 300 pixels.
- Apply the changes and save the image.
How to calculate the position resolution of a PSD (Position Sensitive Detector)
Resolution = Sensitivity / Standard Deviation of the Noise
<sHere:</
- Standard Deviation of Noise refers to the signal’s noise level.
- Sensitivity indicates how much the output changes with input position changes.
You may need the PSD’s datasheet or experimental data for this calculation.
How to find the DPI of an image?
- In Windows, right-click the file, select ‘Properties’, then ‘Details’.
- On a Mac, click ‘Get Info’.
- Or, simply upload your image to an online DPI checker.
How many megapixels in a computer screenshot?
- First, note the resolution (e.g., 1920×1080 pixels).
- Next, multiply the width by the height (1920 * 1080 = 2,073,600 pixels).
- Finally, divide by 1,000,000 to convert to megapixels (2,073,600 / 1,000,000 = 2.07 megapixels).
How to check the resolution of an image?
- On Windows, right-click the file, select ‘Properties’, then ‘Details’ for dimensions.
- On a Mac, right-click the image, select “Get Info”, then check “More Info”.
- Or, open it in any editing software to see dimensions in properties.