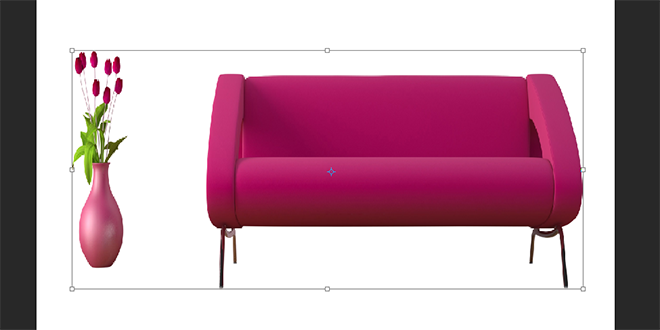
Imagine you need a specific image size, but yours doesn’t fit. Or, you want to turn a portrait photo into a landscape one. To resize a photo, simply use the “change size” option or stretch it to your desired width. In Photoshop, this stretching works wonders. It keeps the image clear and realistic. So, how do you stretch an image in Photoshop?
Understanding Image Stretching
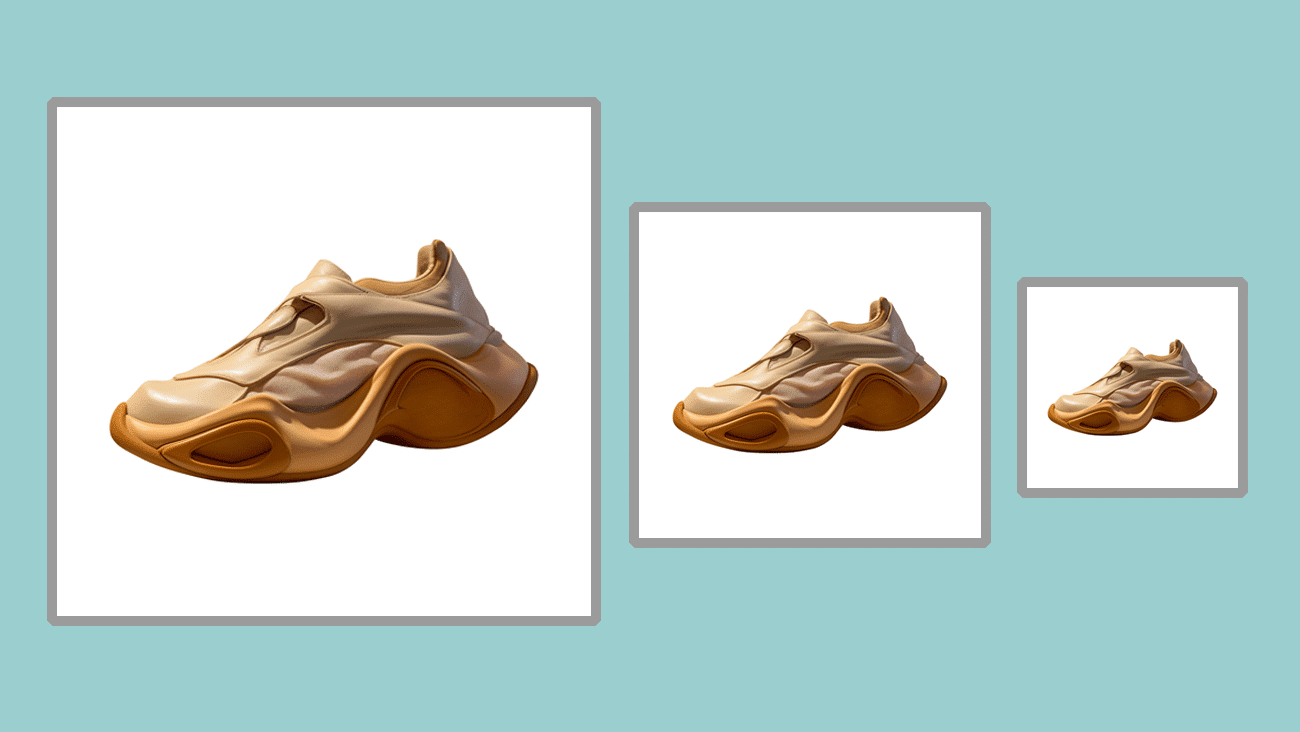
In Photoshop, stretching an image means changing its size. You can make it bigger or smaller, either in one direction or more. This method is used for many reasons, including:
- Resize an image for specific formats, like web banners or digital ads.
- Artists and designers often stretch images for unique effects. This enhances their project’s artistic style.
- Stretching can help change an image’s aspect ratio without cropping it.
The Impact of Stretching on Image Quality
Stretching an image can affect its quality. It’s important to understand these effects to maintain the image’s integrity.
Pixelation and Blurriness: Stretching an image beyond its resolution shows the pixels. The image may then appear blurry or pixelated. This is especially true for low-resolution images stretched to fill a larger space.
Distortion: Stretching can distort subjects in the image. They display a lean or stout physical appearance. This is particularly problematic when stretching is not uniformly applied across the image.
Loss of Detail: Stretching the image can blur fine details. This may not be desirable for high-quality prints or displays.
Tools and Techniques for Stretching Images in Photoshop
Photoshop has tools and commands to stretch images. They let users control the final output. Here’s an overview of the most used tools for this:
Free Transform Tool
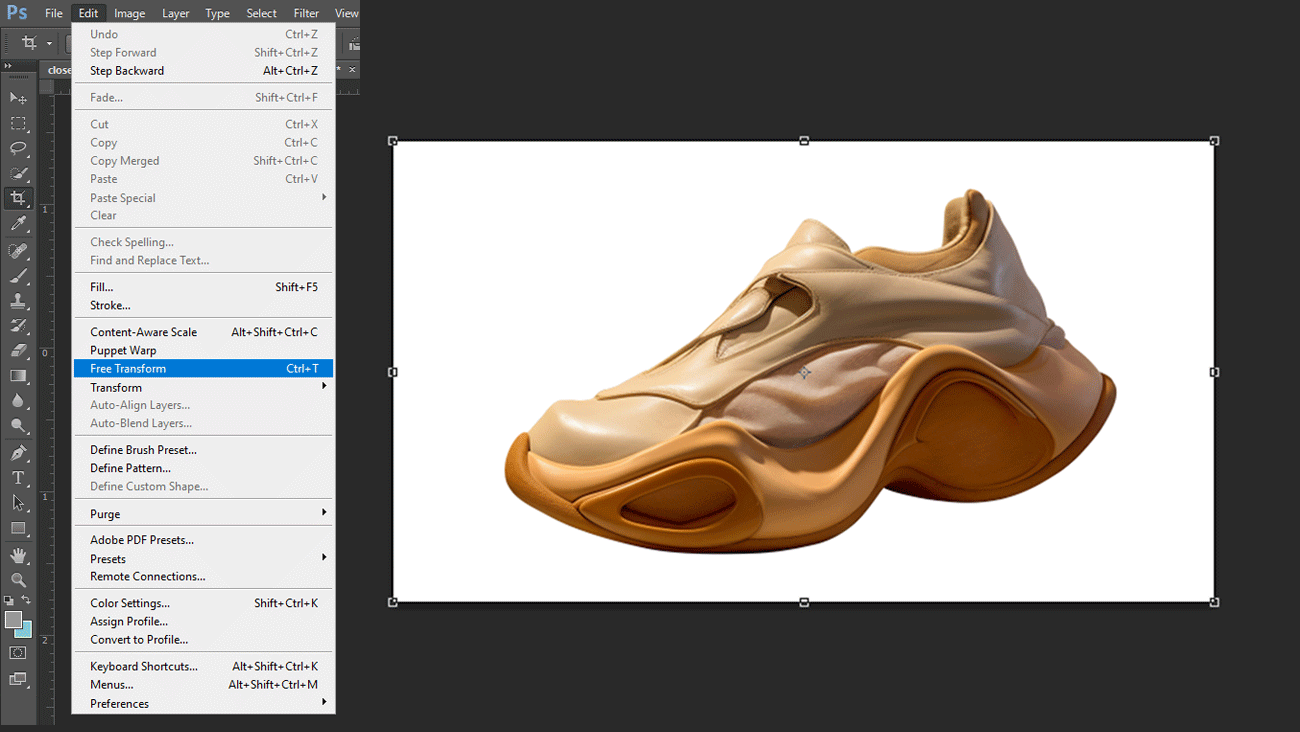
The Free Transform tool in Photoshop is powerful and versatile. It lets you resize, rotate, and distort images easily. First, select your image layer. Then, go to Edit > Free Transform or press Ctrl+T(or Cmd+T on Mac). Handles will appear around your image. Drag these handles to adjust the image. To keep the same proportions while resizing, hold the Shift key. This prevents distortion. Mastering this tool helps you create impressive visual effects in your designs.
Image Size Command
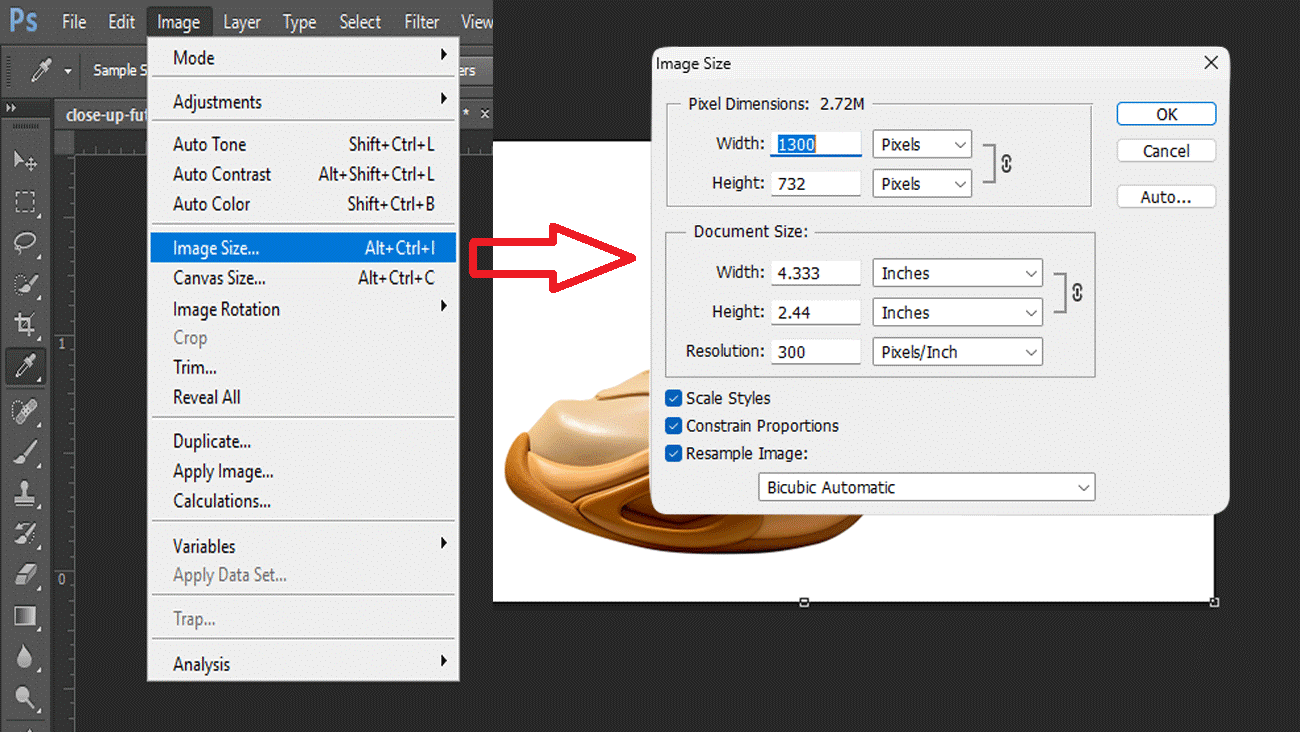
This command is used for more precise control over the dimensions of an image. Access it by selecting Image > Image Size from the menu. In the dialog box, you can specify the new dimensions either in pixels, inches, or other units. You can also choose to lock the proportions to keep the original aspect ratio.
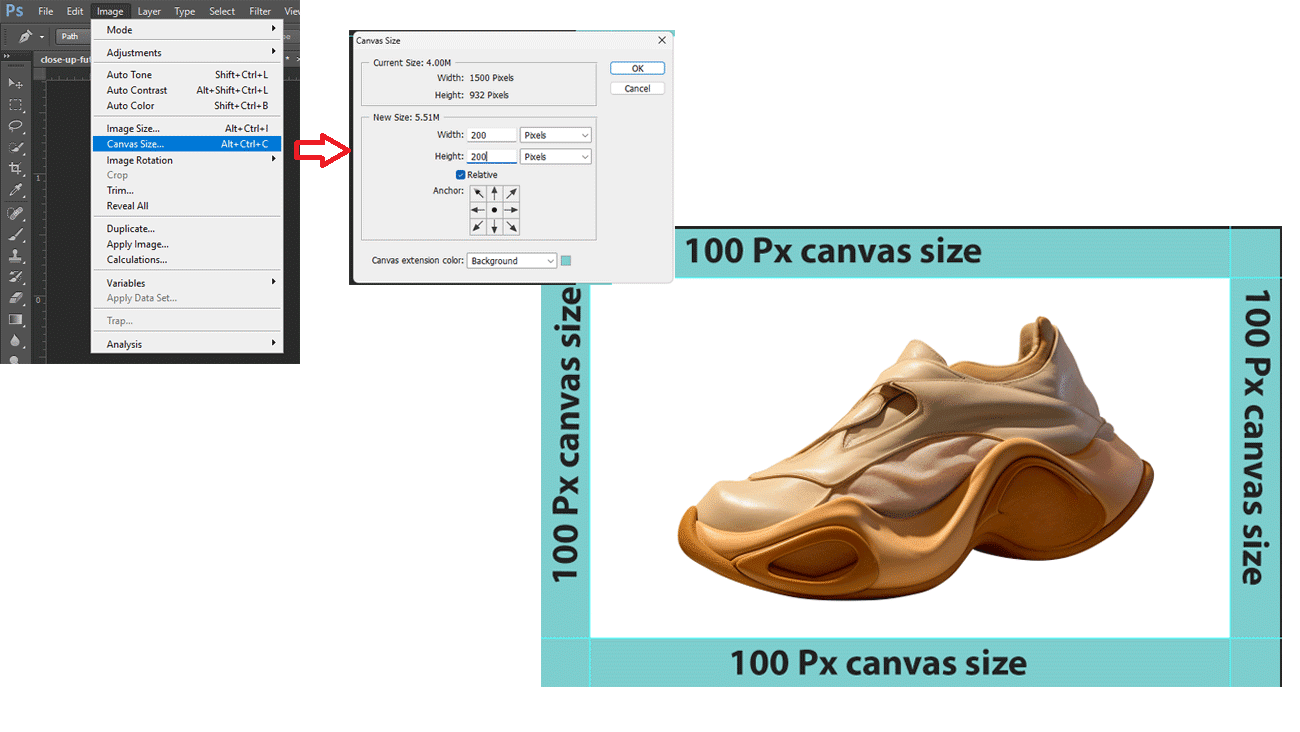
Canvas Size
Use the Canvas Size command to stretch an image’s background or workspace without altering the image itself. Go to Image > Canvas Size. Here, you can add more canvas space around your image or stretch the canvas, which indirectly stretches the image if the layers are not locked.
Content-Aware Scale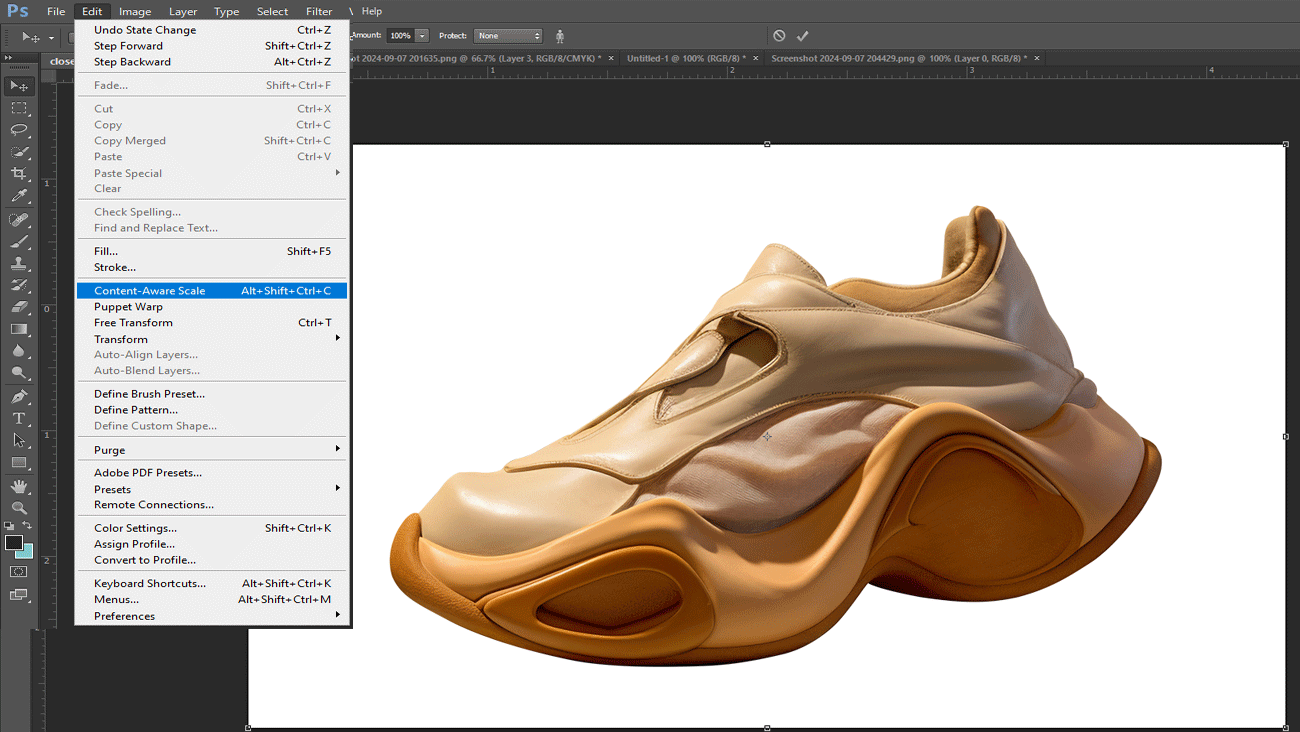
This advanced tool lets you stretch an image. It keeps key areas from being distorted. Select the image layer, then choose Edit > Content-Aware Scale. Use the handles to stretch the image, and Photoshop will attempt to preserve the visual content’s integrity..
Layer Styles and Smart Objects
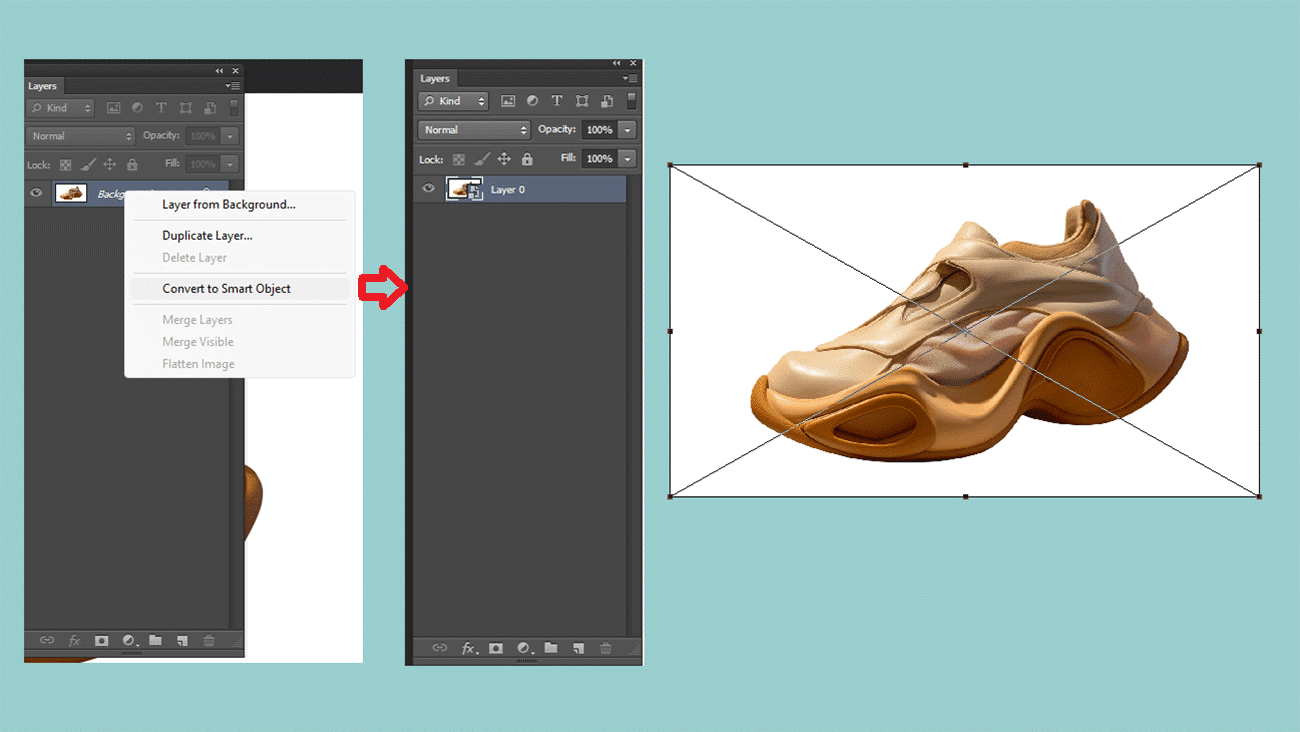
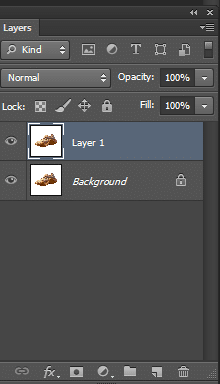
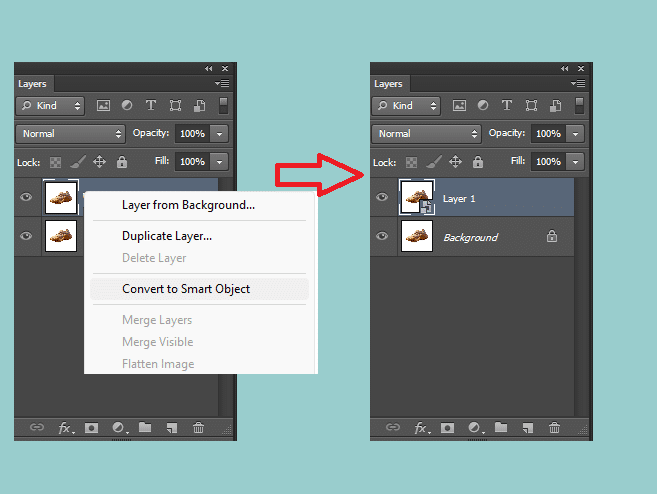
Convert an image to a Smart Object before using any transformation tools. This will preserve the original image data. It will allow for non-destructive edits. Right-click the layer and select Convert to Smart Object. You can then use any tool to transform the image. It won’t change the original data.
How to stretch an image in Adobe Photoshop:
There are two methods to stretch an image in Photoshop. I am describing both methods below step by step:
Follow the following steps, and you are good to go:
- Opening the picture
- Selecting the picture in canvas
- Transforming the edges
- Resizing the center
- Maintain the corners
- 3D Stretching
- Saving the final image
1. Opening the picture:
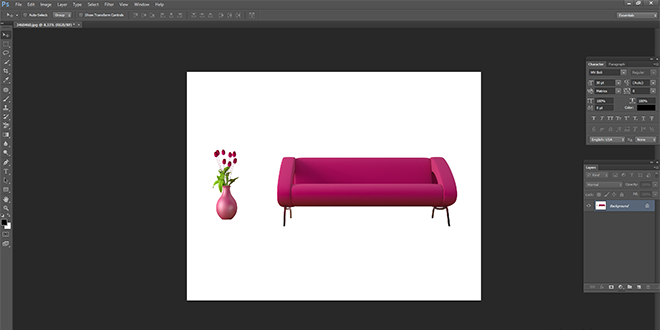
Open Photoshop and go to the top-left menu. Click on “File,” then select and open the picture you want to stretch.
2. Selecting the picture in Photoshop:
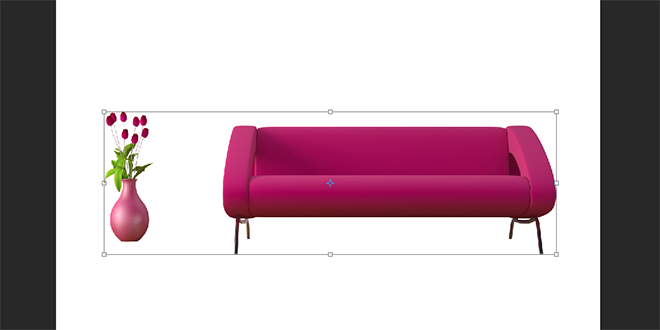
The next step is to press control T (CTRL + T) to select the image in Photoshop. After that, you will see that the picture you want changes is selected from all four sides. Six anchor points for assistance will be visible, too.
3. Transforming the edges:
Once you have selected the picture, all four sides of an image can be stretched per your requirements. You can separately stretch the picture from all four corners or you can change all the sides by selecting the Shift (Shift Key) Option.
The picture can be stretched in both dimensions. You can either start by stretching the width or changing the length of the image. However, stretch the image from the left and right sides (that is, from the width), as this will preserve the image’s quality.
4. Resizing the center:
To stretch the image from the center, press the ALT key and stretch from any position you want.
5. Maintain the corners:
Moreover, you can use the SHIFT and ALT keys to stretch the image so the corner dimensions don’t appear misplaced or dragged.
6. 3D Stretching:
Photoshop, too, provides a 3D option for stretching the image, allowing you to stretch the image and make it look more realistic by adding 3D dimension.
You can use this option by holding any anchor point and dragging the image with the CTRL-key. The image will be expanded into a 3D dimension in this manner.
7. Saving the final image:
When you’ve finished stretching the image to the standards and are happy with the results, Save the stretched image by using the ENTER key.
Advanced Techniques for Stretching Images in Photoshop
Using Content-Aware Scale to Maintain Image Quality.
The Content-Aware Scale is a powerful Photoshop tool. It lets you resize images with minimal distortion to important areas. This tool is great for resizing an image. It keeps the impact of its key elements.
How to Use Content-Aware Scale:
Prepare the Image:
Open your image in Photoshop and select the layer you want to adjust.
It’s a good practice to duplicate the layer before applying transformations (Ctrl+J or Cmd+J). This preserves the original.
Convert to Smart Object:
Right-click the layer and select “Convert to Smart Object.” This lets you use Content-Aware Scale without damaging the original.
Apply Content-Aware Scale:
Go to Edit > Content-Aware Scale.
Drag the handles to resize your image. Photoshop will try to keep important areas of the image. It will stretch the less important areas.
Adjust the Protection:
In the options bar, use the Protect option. It lets you select areas of the image to preserve from distortion. You can use alpha channels to define these areas.
Fine-Tune and Apply:
Adjust your image until you’re happy with it. Then, press Enter to apply the changes.
Benefits:
Maintains the quality of key areas in the image.
Allows significant resizing without obvious distortion.
How to Use Smart Objects for Non-Destructive Editing
Smart Objects are essential for non-destructive editing in Photoshop. They preserve an image’s source content and all its traits. So you can edit it as much as you want without losing quality. How to Use Smart Objects:
Convert Your Layer to a Smart Object:
Right-click on the layer in the Layers panel and select Convert to Smart Object.
Apply Transformations:
After the layer is converted, you can scale, rotate, or warp it. To stretch the image, select Edit > Free Transform or press Ctrl+T (Cmd+T). Adjust the handles as needed.
Edit Smart Object Contents:
To edit the image further, double-click the Smart Object thumbnail in the Layers panel. This opens the source content in a new window. You can edit it without affecting the original image.
Save and Update:
After editing, save the Smart Object (File > Save). Close the window, and the Smart Object in your main document will update with the changes.
Benefits:
Allows for flexible editing without degradation of the original image.
Changes can be undone or adjusted at any time without permanent impact.
Common Pitfalls in Stretching Images and How to Avoid Them
Overstretching Leads to Pixelation
Problem: Stretching an image beyond its original resolution makes the pixels visible. This results in a grainy, pixelated look. This is particularly noticeable in images with low initial resolutions. How to Avoid:
- Use High-Resolution Images: Start with the highest-resolution image. This reduces the risk of pixelation when stretching it.
- Incremental Stretching: Instead of a large stretch, gradually increase it in smaller increments. Check the image quality as you go.
- Content-Aware Scaling: Use the Content-Aware Scale feature to resize images. It will keep important areas while stretching less critical parts.
Forced Distortion of Important Image Elements
Problem: Stretching an image can distort key elements. It can make the image look unnatural or change its announcement. This often happens when aspect ratios are not kept. Or when the stretch is not applied uniformly. How to Avoid:
- Maintain Aspect Ratio: Always lock the aspect ratio when resizing. Only unlock it if you want to distort the image. This can be done by holding the Shift key while dragging the corner handles of the Free Transform tool.
- Use Smart Objects: Convert your image to a Smart Object before applying transformations. It allows non-destructive edits. You can revert or adjust the stretch without permanent effects.
- Selective Stretching: Use the Liquify tool or Warp command for more control. They let you stretch specific parts of an image without affecting the whole.
- Guided Edits: Use guides and grids to apply stretches evenly. This will keep the image’s balance and proportion.
Additional Tips and Tricks for Stretching Images in Photoshop
Keyboard Shortcuts for Quicker Editing
Keyboard shortcuts can greatly speed up your work in Photoshop. This is true for repetitive tasks, like transforming images. Here are some essential shortcuts related to image stretching:
Free Transform: Press Ctrl+T (Cmd+T on Mac) to use the Free Transform tool. It resizes, rotates, and distorts layers.
Constrain Proportions: In Free Transform mode, hold Shift while dragging a corner handle. It will keep the image’s aspect ratio.
Commit Transform: Press Enter or Return to apply the transformation.
Undo: Press Ctrl+Z (Cmd+Z on Mac) to undo the last action. It’s very useful if you make a mistake while stretching.
To move forward, press Ctrl+Shift+Z (Cmd+Shift+Z on Mac). To go back, use Ctrl+Alt+Z (Cmd+Option+Z on Mac).
conclusion
Follow the above steps to stretch an image in Photoshop. All techniques are the most common and easy to use in Photoshop. Of all the options for stretching an image, only the content-aware scale doesn’t distort it.

