
Images on websites and billboards catch attention. They convey complex messages better than words. They engage our visual cortex, allowing quick and easy information processing. Converting images into clip art featuring simple graphics is popular for this.. Designers, marketers, and educators find clip art especially useful. It offers a range of customizable illustrations for engaging lessons or eye-catching ads.
Creating custom clip art from your images has many benefits. It allows for unique designs that reflect your style and align with your brand. Imagine using your company’s colors and fonts in your graphics. This creates a consistent visual experience. Personalized clip art stands out. It avoids the blandness of stock images. This guide will show you how to turn an image into clip art. It covers tools, techniques, and best practices. By the end, you’ll be ready to create custom clip art for social media or product packaging. It will leave a lasting impression.
The Benefits of Converting Images into Clip Art

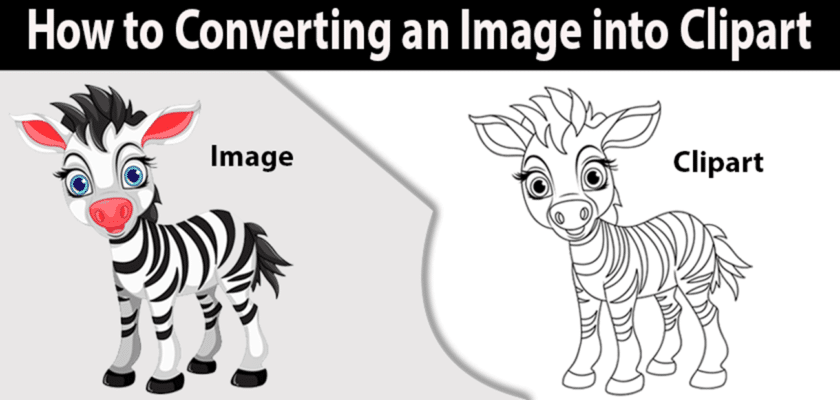
converting and Image into a Clipart
Before discussing how to make custom clip art, let’s highlight its benefits.
- Personalization: Custom clip art showcases your brand. For example, a fashion brand might highlight elegance. An educational site could use playful designs.
- Versatility: Use custom clip art in social media, print, presentations, and emails. This ensures a consistent look, like Coca-Cola’s branding across all platforms.
- Cost-Effective: Creating your own clip art saves money. Avoid buying stock images repeatedly. This is key for small businesses or freelancers needing multiple designs.
- Creative Control: You have total control over your designs. Tailor them to your needs without compromise.
- Scalability: Vector graphics can be resized without losing quality. This suits various applications, from website icons to large banners. A logo can remain consistent across a business card, billboard, and website.
Step-by-Step Guide to Converting and, Image into a Clipart
1. Choosing the Right Image: Laying the Foundation for Success
Selecting the right image is the first crucial step in creating clip art. A good starting point can make all the difference in the final outcome. When browsing for an image, consider the following essential factors:
Image Quality and Resolution: Clarity is Key. Use high-resolution images with precise details for clip art conversion. A clear, sharp starting image boosts the product’s usability and clarity. Imagine taking a high-quality photograph versus a low-resolution screenshot – the difference is stark. A high-res image of a tree would show individual leaves. A low-res image would be pixelated and lack detail.
Image Format: The Right Tool for the Job. Use JPEG and PNG for clip art. They are the best formats due to their versatility. PNG is particularly useful when transparency is required, such as in logos or icons. Avoid formats like GIF. They often use compression, which reduces image quality. So, they are unsuitable for creating clip art. Image formats are like tools in a toolbox. Each has its own purpose.
Background Considerations: A Clean Slate: The image’s background affects conversion ease. Solid backgrounds, like white or transparent, are best for clip art. They provide a clean canvas for creating it. Complex or busy backgrounds can complicate things. They make it hard to isolate the main subject. Imagine trying to extract a delicate flower from a cluttered garden. Now, imagine doing it against a plain white background. The difference in difficulty is huge.
2. Preparing the Image: Refining the Raw Material
Once you’ve chosen an image, it’s time to prepare it for conversion. This step involves several crucial tasks:
Removing the Background:
Unveiling the Subject: Isolate your subject by removing the background. Tools, like Remove.bg, Adobe Photoshop, or GIMP, can effectively eliminate unwanted backgrounds. Online options like Clipping Magic are also handy for quick background removals. Think of background removal like peeling an onion. Each layer reveals more of the subject.
Cropping and Resizing: Focusing on the Essence: Crop the image to focus on the subject. Remove any unnecessary elements that do not add to the clip art. Resize the image to fit your desired clip art size. It must be suitable for its intended use. This step is like pruning a tree – you cut away the excess to reveal the essence.
Adjusting Colors and Contrast: Use software like Photoshop or GIMP to boost your image’s colors and contrast. This makes it more appealing.Changing these settings helps vectorization software to tell parts of the image apart. Imagine increasing the contrast on a faded photo. The result is a more vibrant, engaging image.
3. Vectorizing the Image: Transmuting Pixels to Paths
Vectorization is the heart of converting an image into clip art. This process converts your raster image (made of pixels) into a vector image.
Understanding Vector Graphics: The Power of Math. Vector graphics use math to create shapes and lines. This makes images that can be scaled infinitely without losing clarity. This is a big advantage over raster images. They can become pixelated when resized. Imagine zooming in on a vector image of a circle. It stays smooth and crisp. A raster image, though, becomes distorted.
Using Vectorization Tools: The Right Tool for the Job. Popular tools for vectorization are Adobe Illustrator,
- Inkscape,
- online converters like:
- Vector Magic
- and AutoTracer.
Each tool has strengths and weaknesses. The right choice depends on your needs and skill level. For instance, Adobe Illustrator has advanced tracing options. Inkscape has both manual and automatic tracing.
Manual Tracing for Complex Images: Precision and Patience. For intricate images, manual tracing may yield the best results. This involves using the pen tool to trace around the image’s outlines carefully. This method is slow. But, it allows for better control and accuracy, especially for complex designs. Imagine tracing the intricate patterns of a Celtic knot. The result is a precise, detailed vector image.
4. Refining the Clip Art: The Final Touches
After vectorization, refine your clip art. It must look polished and professional.
Smoothing Edges and Removing Artifacts:
Cleaning Up: After vectorizing, use the smoothing tools in your vector software. They will clean up jagged edges and unwanted artifacts. This step is crucial for creating professional-looking clip art. Imagine smoothing the rough edges on a hand-drawn illustration. The result is a more refined, polished image.
Adding Details and Effects: Bringing Depth to the Design: Enhance your clip art. Use shadows, gradients, or subtle effects. These additions can add depth to your design. But, use them sparingly to keep the simplicity of clip art. A subtle gradient on a vector button image would make it more appealing and engaging.
Converting and Image into a Clipart Scalability Unleashed. Finally, save your clip art in a vector format, like SVG or AI. These formats ensure scalability. You can use your clip art at any size without losing quality. It’s also advisable to export a PNG version for easy web use. Imagine scaling up a vector logo to fit a billboard. It stays crisp and sharp. A raster image, however, becomes distorted.
Comparison of Different Vectorization Tools
Choosing the right vectorization tool greatly affects your clip art quality. Here’s a detailed comparison of popular options:
| Tool Name | Description | Supported Formats | Key Features | Pricing Model |
| Adobe Illustrator | Professional vector graphics editor | AI, SVG, EPS | Advanced editing tools, live trace, high-quality output | Subscription-based |
| Inkscape | Free and open-source vector graphics editor | SVG, PDF, EPS | Node editing, path operations, freehand drawing | Free |
| CorelDRAW | Vector graphic design software | CDR, AI, SVG | Powerful design tools, extensive font library | One-time purchase or subscription |
| Vector Magic | Online vectorization tool | SVG, EPS, PDF | Automatic tracing, batch processing, high accuracy | Pay-per-use or subscription |
| Autotracer | Free online tool for vectorizing images | SVG, EPS, PDF | Simple interface, quick processing | Free |
| Vecteezy Editor | Online vector editor and design tool | SVG, PNG | User-friendly, templates available | Free with premium options |
| Photopea | Online photo editor with vectorization features | PSD, SVG, PNG | Layer support, free to use, no installation needed | Free with ads |
Tips and Tricks for Creating High-Quality Clip Art
Use Online Resources and Tutorials: Join the vector graphic community online. You’ll find many tutorials, forums, and groups to improve your skills. YouTube, for example, has videos that teach you everything from using the pen tool to making detailed illustrations. A simple tutorial on creating icons can kickstart your clip art journey.
Save Time on Repetitive Tasks: If you often make clip art, build a library of design elements like buttons, icons, or textures. This saves time and ensures your projects look consistent. It’s like having a recipe book. With basic elements ready, you can easily create new designs.
Follow Design Principles for Quality Clip Art: Aim for a design style that matches your brand. Use solid colors or simple gradients. Avoid clutter and keep outlines clear. This makes your clip art stand out. Consistent designs improve brand recognition. For example, a uniform color scheme can evoke feelings, just like a familiar song.
Vectorization Problems: You may face issues like distorted paths or lost details. Don’t worry. Adjusting tracing settings, reducing noise, and simplifying paths can help. It’s like tweaking a recipe – small changes matter. For specific solutions, check manuals or forums for your software.
Conclusion
Use these tips in your work. You’ll create high-quality clip art. It will boost your visuals and set your brand apart.
Converting and image into clip art is a useful skill. It lets you create visuals for your projects. This guide shows you how to make high-quality clip art. It adds a personal touch to your work.
Custom clip-art improves your projects. It ensures a consistent visual style. Creating your own clip art helps you stand out. So, start today and enhance your designs!
Try different techniques and tools. Explore vector graphics. Your creativity has no limits! Whether for fun or work, custom clip art makes a big impact.
FAQ
How do I Convert an Image into a Clipart?
-
- Choose the Right Image: Start with a high-resolution image featuring a clear subject. A simple or solid background is best, as it lets the main element take center stage. For example, if you want to create clipart of a dog, a photo with a plain background is easier to work with.
- Edit the Image: Use your preferred image editor, such as Photoshop or GIMP, to enhance your image. Then, use tools like the magic wand or lasso to remove the background.Then, crop the image to focus on the essentials. Finally, adjust the colors for better clarity. This step is crucial for making your clipart stand out.
- Convert to Vector: Now, convert your raster image into a vector graphic. You can use powerful tools like Adobe Illustrator or online converters. In Illustrator, the ‘Image Trace’ feature is useful. It lets you turn your image into a scalable vector format.
- Refine Your Clipart: After vectorization, review your clipart. Fix rough edges, remove artifacts, and add details to improve your design. This step requires patience and attention to detail, but the result is worth the effort.
<liSave as Vector: Finally, save your clipart in a vector format, like SVG or AI. It must be resizable without losing quality. This flexibility is essential. It lets you use your clipart on various platforms and apps.
By following these steps, you can create unique clipart. It will meet your needs and enhance your projects.
How to Vectorize an Image in Illustrator?
- Open Illustrator and Create a Document: Start Illustrator and go to “File” > “New”. Set your document size.
- Import the Image: Go to “File” > “Place” to add your image. Drag it to position it.
- Select the Image: Click on the image. The Image Trace option appears in the top toolbar.
- Open Image Trace for More Options: Click the Image Trace button or go to “Window” > “Image Trace”. Adjust your settings here.
- Adjust Settings: Choose presets like “High Fidelity Photo” or “Black and White Logo”. Fine-tune settings like Threshold and Paths for the best results.
- Start Vectorization: Click “Trace”. Your image turns into a vector graphic.
- Expand for Editing: Click “Expand” to make the vector editable.
- Refine Your Image: Use the Direct Selection Tool (A) to tweak points and edges.
- Save Your Image: Save it as SVG, AI, or PDF to keep it scalable and high-quality.
What types of images work best for clipart conversion?
- Simplicity: Choose images with clear shapes and few details. For example, a simple logo works better than a detailed city photo. Complex images can turn into messy clipart.
- High Resolution: High-resolution images produce better-vectorized results. Think of it like making a blueprint. The clearer the plan, the better the final product. Low-resolution images can become blurry when scaled up.
- Contrast: Images with strong contrast are easier to work with. For example, a black cat on a white background is ideal. The high contrast makes it easy to separate the cat from the background.
By following these tips, you’ll create cleaner, more professional clipart for your project.
Can I create a clipart from a photograph?
- Simplify the Image: Remove distractions. Focus on the main subject. For a cat photo, eliminate the background. Highlight the cat.
- Edit the Photo: Adjust brightness, contrast, and colors. Remove tricky details. Think of it as prepping ingredients.
- Use Vectorization Tools: Software like Adobe Illustrator can help. This step can be tricky. You might need to trace complex parts manually.
Simpler images work best. They convert easier and look better. A minimalist approach is key.
What software can I use to create clipart besides Illustrator?
- Inkscape: This free vector graphic editor is perfect for all users. It offers tools for tracing and converting images. Inkscape supports formats like SVG, PDF, and PNG.
- CorelDRAW: Known for its ease of use, CorelDRAW is popular among designers. It features “PowerTRACE” to enhance images into vectors. The software also boasts a vast library for custom designs.
- Affinity Designer: Affordable yet powerful, Affinity Designer caters to various needs. It supports both raster and vector graphics. The software is compatible with Adobe Illustrator.
- Gravit Designer: This free, web-based tool is easy to use for everyone. It features a simple interface and the “Vectorize” tool for quick conversions. Gravit Designer also allows real-time collaboration.