
Sometimes, we need to create a transparent background image for various purposes, such as Photo Background Removal, changing Image Backgrounds, and creating transparent background PNG pictures in Photoshop. Users can place the images anywhere on the website or other places without concentrating on the color of the page background.
Following just five simple steps to make a transparent background with Photoshop using the Magic Wand Tool will become effortless. So, have a quick read of the steps below.
Table Of Contents
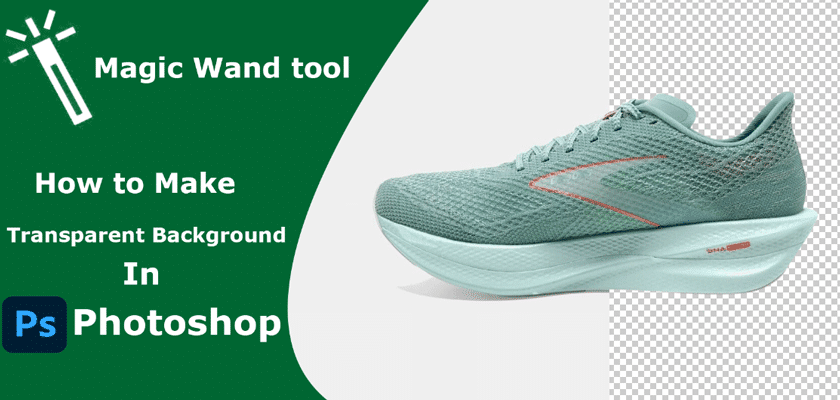
How to Use Magic Wand tool to Create Transparent Background
Step 1: Open Your Image in Photoshop

Launch Photoshop and navigate to “File” > “Open” to select your image. Your battleground has been set!
Step 2: Meet the Magic Wand tool

Locate the Magic Wand Tool in your toolbar (it looks like a wand with a sparkle). This little gem is best for simple, solid-colored backgrounds.
Step 3: Unleash the Magic

Click directly on the background area you want to banish. As if by magic, Photoshop will select similar-colored pixels.
Step 4: Wave Goodbye to the Background

Simply hit the Delete key on your keyboard. Poof! Your background is now transparent.
Step 5: Tweaking with Tolerance

The Magic Wand has a hidden power: tolerance. In the options bar at the top of your screen, adjust the “Tolerance” value. A higher number lets the Wand select more colors. This is helpful for slightly varied backgrounds.
Step 6: The Power of Masks

Selections are rarely picture-perfect. Layer masks are like a super-powered eraser. They let you tweak your selection gently without harming your original image. Look for the layer mask icon in the Layers panel.
Step 7: Save Your Transparent Treasure
Choose “File” > “Save As” and select PNG as your file format. PNGs preserve transparency, making sure your hard work pays off.
How to Create Transparent Image Background Use Photoshop’s Magic Tools.
1. Make Image Background selection
In the first step, open Adobe Photoshop, then open the image in Photoshop. Now, use the layer panel resting by default on the right of the image window. If you do not see that then you can be easily on the Top Men options ‘window’ and go to the layers option.

Now use the background layer option by double-clicking on it and a new layer will be in front of you and then press ok. After going through the step unlocking the background layer is possible and you get the option to make transparent background or delete anything from it.

Now, use the background layer option by double-clicking on it, and a new layer will be in front of you. You can rename the new layer or leave it as it is and then press ok. After going through the steps, unlocking the background layer is possible, and you get a transparent background look when you delete anything from it.

Now select the ‘Magic wand tool’ from the left toolbar option. Then, select the background with this tool by right-clicking on the mouse.

These marching ants will show the selection of the object, and the user can easily add more products or remove the background. If he finds the selection not to be perfect, for this purpose, add more hold on the keyboard “shift” button, select more Places, and hold on the keyboard “Alt” button, then subtract from selection places.

2. Delete or Remove the Background from the image.
Now, you have to delete the background. Press the keyboard “Delete” Button to make a transparent image, and, Okay, check the result.

3.Image saving as a Transparent Background
Saving the image in the correct format is vital for displaying it with a transparent background on the e-commerce website. The recommended format for saving the images is Png-24, never letting the pixilated halo while placing the images on the different color Picture background. It is possible to use other formats like PNG-8 and GIF. You can save the file using png-24 by using the shift+Alt+Ctrl+S. Also, you can go for options like file and then export dropdown menu, which is available in the application window.

Tips to Create a Transparent Background for a Logo
Creating a transparent background for the logo increases its flexibility. This enables the user to display it anywhere on the site, regardless of background color.
Step 1: Open the logo in Photoshop
The first step is to open the logo in Photoshop. To open this, press “File” >> “Open” from the top left menu.
![]()
Step 2: Make a Transparent Background Photo of the Logo
This step is basically for those working with the JPG format. In this case, selecting and deleting the background from the image is necessary. The steps will be like double-clicking the background layers and then pressing ok to convert the background to “layer 0”. The selection of the logo file is a bit different, so for the selection, choose the Magic Wand tool. Click on the white background of the logo file, and to select the multiple areas, hold the shift key. Then, use the Magic Wand tool to add the selection.
![]()
After that, Press “Delete” after selecting the entire background. That’s it. Your transparent background with the grey and white check pattern will be achieved after this step.
![]()
Step 3: Save the image as a PNG file
The next step is to save the image in the proper file format. The image’s saving will be done the same way as mentioned above. All we need to do is to save our logo image by following the instructions below:
- Click “File” on the top menu, then select “Save As.
- Select “PNG” (*.PNG) as the format.
- Click “Save” to finalize the changes.
Why You Need to Make Transparent Background Image
Transparent backgrounds are a silent hero in the world of digital media. But why do they matter so much? Here’s a few compelling reasons:
- Versatility is Key:
- You can use transparent images on any website or in any graphic design or product catalog. They work no matter the background colors or patterns. This means you don’t have to make multiple image variations. You don’t have to make them to match different designs. This saves time and effort.
- Smoothness:
Clear backgrounds make marketing materials, online stores, and websites look clean and modern. They let your subject shine. They avoid distractions, making your content more appealing. - Creativity Unleashed: Transparent backgrounds unlock a world of creative possibilities. You can layer images over textured backgrounds and also make dynamic collages. You can put your subjects into video projects or you can do this with smooth transitions.
The Power of Transparent Backgrounds
Let’s back up the importance of transparent backgrounds with some eye-catching statistics:
- E-commerce Boost:
Amazon found that products with clear backgrounds had a 21% higher conversion rate. The clear ones were better than the many destructive images. - Visual Engagement:
Images with transparent backgrounds consistently see higher engagement on social media platforms. [source needed] - Web Performance:
PNG format has clear backgrounds. They are often have smaller files than other formats. This speeds up page loads and helps users.
Where the Magic Happens: The Power of Applications
- Product Photography: Image quality significantly influences e-commerce sales. Studies show that over 75% of online shoppers rely on product images to inform their purchasing choices. A crisp product photo has a clear background. It lets your product shine, making it easier for customers to imagine using it.
- Graphic Design:
Imagine creating striking social media graphics, eye-catching banners, or complex composite images. Transparent backgrounds make it simple to combine elements seamlessly. Layer different images on top of each other for stunning collages and design effects. - Web Design:
With transparent backgrounds, your images and graphics adapt perfectly to different website designs. No more white boxes around images on colored backgrounds. Instead, create elegant and unified visual experiences. - Print Marketing: Unleash your creativity in brochures, flyers, or packaging. A well-placed image has a transparent background. It effortlessly fits with your text and other design elements.
Transparent backgrounds are incredibly versatile in today’s visually-focused world. They are not some complex trick reserved for seasoned design professionals. Adobe Photoshop makes this possible for anyone willing to explore the tools. It opens the door to a new realm of creative options.
You may be a business owner, a new graphic designer, or someone who wants to add a spark to photos. Embrace the power of transparent backgrounds. Let your imagination run free!
FAQ:
Why make backgrounds transparent?
- Isolate subjects for seamless integration into new scenes or compositions
- Showcase products on different backgrounds in e-commerce
- Create layered effects in graphic designs
When the Magic Wand Isn't Enough
- Quick Selection Tool: Found in the toolbar, this tool acts like a smart brush. Paint over the object you want to keep, and the tool intelligently finds its edges.
- Pen Tool:For the ultimate precision, the Pen Tool allows you to draw precise paths around your subject. It takes some practice, but it’s the choice for intricate selections.
When to Use Photoshop’s Magic Tools ?
-
- Your image has a uniform background color with little to no variation
- There’s a clear distinction between the subject and the background.
My image still has a faint outline around it after removing the background. How do I fix that?
- Utilize the Refine Edge tool to smooth the transition and eliminate stray pixels.
- Consider using a layer mask to non-destructively conceal any remaining edges.
Are there any quick ways to remove a simple, solid-colored background?
The background of my image is complex. What tools should I use?
- Start with the Quick Selection Tool for a general selection.
- Refine the selection further with the Pen Tool for precise control.
- Employ Refine Edge or Layer Masking to achieve a flawless transition.
Are there any resources where I can learn more advanced techniques?
- Adobe’s official Photoshop tutorials
- YouTube channels dedicated to Photoshop education
- Specialized online courses on platforms like Udemy or Skillshare.