
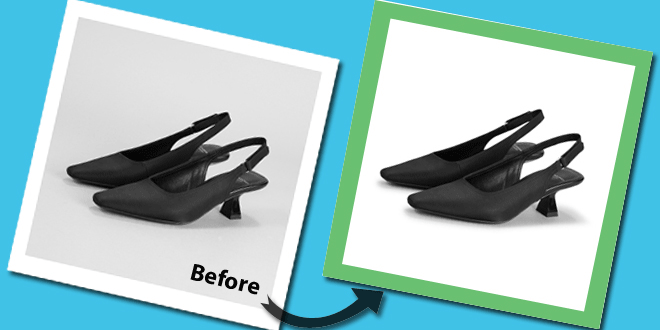
Owning a website is quite a trend these days and important also to reach great heights in the business. Selling products online is a challenging task. As you need to create enough market to let people trust you for quality and authenticity. Even if you are not selling products on the website. It should be highly appealing for people to trust your brand. It was never easy to make the products look presentable but now with various Product photo editing tools. The product photos are edited in a way to makes them look the best in every sense.
By using proper brightness, contrast, sharpness, hue, saturation, and other features, the pictures are given an awesome appeal. While clicking the pictures, special care is taken so the pictures look good. But in most cases, the images don’t look professional even though. They are clicked with a high-quality camera, finest lighting, and lens. Due to this, the need for post-production arises which gives an ultimately appealing look to the images.
In old times, the photographers used to spend a lot of hours in the dark rooms to get the pictures done. But now with the advent of time, the time has reduced as the cameras have upgraded. With the availability of the best software, boring pictures can be edited and given a professional appearance. Since post-production requires time because every photo is to be edited individually. You can excel in the skill with lots of practice. Let us see what the possible ways to edit the product photos are:
Photo Editing Software suggestions
With the right choice of software, it becomes easy to edit product photos. Adobe Photoshop, Lightroom, and Corel are a few software which is used in the designing and graphic industry to give a new dimension to the images. Depending on the image requirements, the software is used. The right set of tools is applied to the pictures to get the desired look.
Spot retouching
Spot retouching is all about removing the imperfections, blemishes, patches, spots, and other flaws on the skin. No one has that perfect skin due to which spot retouching comes in use. By applying retouching tools like patch tool, spot healing tool, clone stamp tool, and brush tool, the images are edited. Any dust, dirt, patches, scratches, spots, or unwanted hair on the image are removed with the help of these tools. To make things work, a duplicate layer is created on which image editing is done in order to keep the original image safe and secure if the photo editing goes wrong. The main purpose here is to make the photo look natural and original without putting any artificial element in the image.
If you want to remove pimples or blemishes, the spot healing brush tool is dragged or clicked over that particular area. Adobe Photoshop will automatically remove the imperfections of the chosen area and deliver you the best images.
Color adjustment
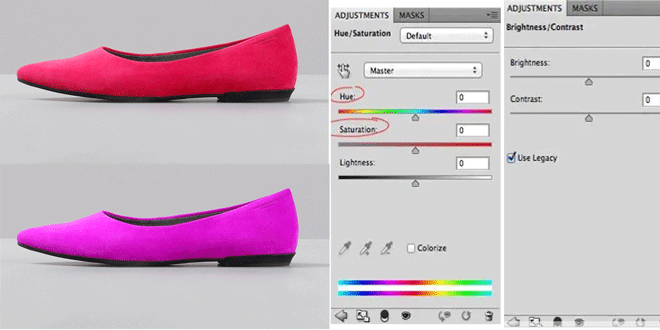
The images are edited in the post-production phase because there are flaws and color balance issues in the RAW files. In the Product photo-editing stage, you can make things stand out by adjusting the colors, sharpness, brightness, contrast, hue, and many other elements. While color adjustment is a tricky part because a little mistake can ruin the whole image, you should be very careful when experimenting with blacks, greys, and whites. There are curves when you want to adjust the colors so make sure to do it correctly to get the desired results. If you are unsure of how to do this, read the tutorials or watch videos and then you will be able to get appropriate results.
Alignment
Image alignment is an important part because it is essential to adjust the size and format of the picture. Since the images look bad when the alignment is not proper, you should correct them in the photo-editing phase. Create a copy of the original image, set the alignment, and then upload the pictures on the website. To get perfect results, make sure to export the photos in the maximum dimensions because they look high quality.
Camera lens
The camera lens holds an essential place in product photography and when it comes to detailed images, the lens is most important. If you want to get rid of spending too much time product photo editing, make sure to use a good-quality camera lens. Since the camera lens plays a significant role in highlighting the important parts of the product, it also gives the image a high resolution and premium-quality look.
Save the image
Once when you are done with all the editing, it’s time to save the image in the desired format. Compress the images first before saving because compressing reduces the bytes of the file thus making it easy to load them on the website. When the images are compressed and optimized, it will help in the SEO of the website.
Editing Product Photos has never been this easy