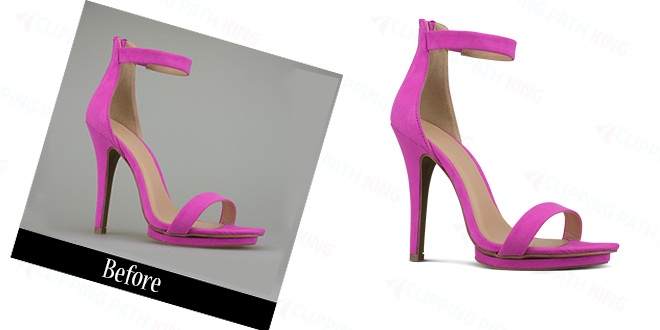
So are you ready to upload the images on your website? Once when you are done with everything, image uploading is the last and most important step. Shooting high-quality images is something most of the people can do but editing the images and making them ready for the portal is an essential task. If the images are not attractive, chances are high that you will lose a lot of business. So what does it cost you? Absolutely nothing much and just a few efforts and money and there you go with beautiful product images.
To have the product images ready for upload, you have to prepare the images for web. It involves clipping path, background removal, retouching and most importantly, image optimization. Also, if you want to edit tons of images, it needs time, efforts and money. To deal with that, you can hire a clipping path service provider that will help you achieve efficient results. But if you want to do it yourself, then here are a few steps you can follow. Check out:
Step 1 : Basic image Editing
The first step is editing the images in Photoshop. Open the images you want to edit in Photoshop but make sure that to speed up the process, open those images for which you want the same effects or changes.
- Go to Exposure tool to brighten the image. If you push the slider to the left, the image will get darker and moving it towards the right will make the picture brighter.
- Next, you can use the Brightness tool to brighten the product a little more on specific areas. Plus, there is an option to use Contrast tool and Blacks too.
- Save the images in JPEG form and make sure to save them all together in one folder for future use.
Step 2: Spot Retouching
Now it’s the time for spot retouching in Photoshop. Open the JPEG images into Photoshop and start working on each image one by one.

- Let us suppose, there is an image of suede shoes which attract dust and dirt quite easily. The dust and dirt is not visible in the camera but when you open it in your computer in zoom mode, you will see there are marks on the leather. It will definitely not look good when customers see the picture from closer.
- To remove this dirt or scuff marks, duplicate the layer to compare the results afterward. With patch tool, remove all the tiny particles. For that, select a circle around the spots and move that selection to the area you want it to look like. It will replace the imperfection with the perfect area.
- For harder areas, clone stamp tool works best and burn and dodge tool are helpful to even out the tones in areas of your product. Burn tool is good to darken an area whereas the dodge tool is to lighten a specific area.

To compare the results, toggle the retouching layer on and off and see how the image looks completely different and new. If you want to do more editing to make the product image look even better, then perform the next step.
Step 3: Quick Color Adjustment
The next thing you can do is a color adjustment. To make the product pop out, you need to work on the curves of the images. Since color adjustment is a little tricky, you will understand properly once you work on it.
- The top of the curve is responsible for the whites, the middle for the greys and the bottom curve affects the blacks. While you look at your image, try to figure out which areas need enhancement in which tone. If you need more contrast in the whole images, pull the white curve to be brighter.

- Furthermore, you can create a Hue/Saturation layer to work on the vibrancy of colors. While changing a color to another color, the hue toggle comes in use. Move it in the adjustment layer until you get the desired color. If the color is too vibrant, use the saturation toggle and move it to the left for desaturation. To make it more saturated, move it to the right.

Step 4: Shadow and Save
This is the final step after you are done with the editing. Now is the time to add shadows to make the products pop out from the background. It is important to attract the viewers as by adding shadow, the products look realistic. Also, the shadow lends more depth to the ordinary images.
Are you done? Now save the image as the product looks perfect and beautiful. Save the PSD file for future use and then save the image in JPEG format to upload on your website. Start editing the pictures and achieve great results.

