
Have you ever taken a photo of your friend during a beautiful sunset and viewed it on your computer? The light sources you use, the direction of the lighting, and the time of day significantly impact your photography. Just like with news articles, the saying holds true for creating images. Consider the light source, which plays a crucial role in creating differences.
Light comes in various colors and forms. It can be in front of or behind your subject, above, from the side, or even rarely from below. A photograph captures the light reflected off your subject onto your camera’s image sensor. Knowing which light sources work best is essential for various types of photos. Here’s a quick summary.
Front lighting source every photographer should know.
Your subject is front-lit once the sunshine source is directly behind you and shining on the issue you’re photographing. Though most subjects tend to be lit quite well once you use front lighting, they typically lack the shadows that offer them definition. You may suppose front lighting could be a sensible plan for portraits; however, it tends to change the shape of the face while drawing attention to blemishes and scars.

This is the most important downside with normal camera-mounted flash snapshots. The flash shines a light directly on your subject, and it tends to eliminate a number of the definitions in your subject’s face. If you are too shut with a flash, your subject’s face will be pale and a scary sight to see. It’s far better to require portraits outdoors wherever the natural daylight is far less harsh and direct.
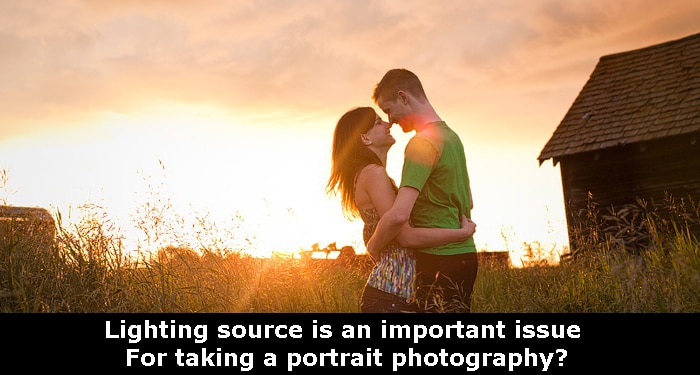
Portraits with Back Lighting source: A Photography Challenge
This is the matter you face after you take an image of your friend before a beautiful sunset. You’ll be able to see the sunset simply fine. However, your friend’s face could be a massive black mess. It works splendidly for a silhouette shot on top of, but not most if you wish to visualize their faces. Backlighting happens once the sunshine supply is behind your subject. As a result of solely a tiny low quantity of sunshine shining on your subject, it’s dark, whereas the sunshine supply is extremely bright or fully white and washed out.

You can fix backlighting with a flash, some reflectors, or some lamps. There are completely different blessings and downsides to every choice. Even as we tend to mention before lighting, a flash will be too powerful once it’s laid off directly at your subject, and you cannot forever carry moveable lights every place you go. The perfect answer for your backlighting drawback is maybe a mixture of 1 or 2.
If you have no extra lightweight sources, you can switch the exposure forever. Move to the opposite aspect of your subjects and create a splendidly heat-lit shot. You won’t get the sunset in the background, but it’s better than nothing!
Pro tip: If you’ve got another illumination source within the area or outside, think about using a reflector to place additional light on your subject. Most massive reflectors will be folded and carried in your instrumentality bag. They pop open promptly, permitting you to set up a search and take it down as you undergo your shoot.
Portrait Photography tips with side lighting source
You guessed it. Once the sunshine supply is on to the aspect of your subject, you get aspect lighting. A lightweight supply for this aspect is right. As a result, it produces little shadows that provide your subject with some texture. Food photographers base their business on making aspect-lit pictures with barely perceptible shadows. That is what makes the nooks and crannies in food photography look, therefore, delectable.

Side lighting is additionally excellent for portraits. Several photographers shoot indoor portraits that victimize some reasonable lighting aspects. Once they do not bring their skilled gear, they believe their camera-mounted flash. Would not that manufacture front lighting? It might if you were aiming the flash directly at your subject. The pros, on the other hand, are that you get away with a higher impact after you put your flash head at the wall behind you and bounce the flash off of it. This not only makes the sunshine less harsh and direct, but it additionally lights your subject from the aspect.
Lighting tips for overhead portrait photography
This is the sort of lighting you are likely to encounter in workplace buildings. It tends to be fluorescent lighting similarly, thus it’s the price you’re whereas to listen to your camera’s white balance settings. Overhead lighting comes directly from higher than and will forge some strange shadows on your subject’s face if you are not ready.

Luckily, the remedy for overhead lighting could be a straightforward reflector (or mirror or sheet of tin foil). The sunshine itself is superabundant. You must be compelled to send it from the ceiling to your subject. Produce a forty-five-degree angle from the bottom to your reflector, and confirm you’ll see the sunshine on your subject before you snap the picture. That is ideal if you place your reflectors on the facet of your subject. You wish to preserve a number of the shadows. Another trick is boosting your camera and raising your subject to appear upwards. That means their face is additionally front-lit.
The key to any or all of this is to listen successive times you depart for a shoot. Note that wherever the sunshine is returning from its appearance, there are little changes within the shadows on your subject. With some observation, it will not take too long for you to become a real lightweight connoisseur.