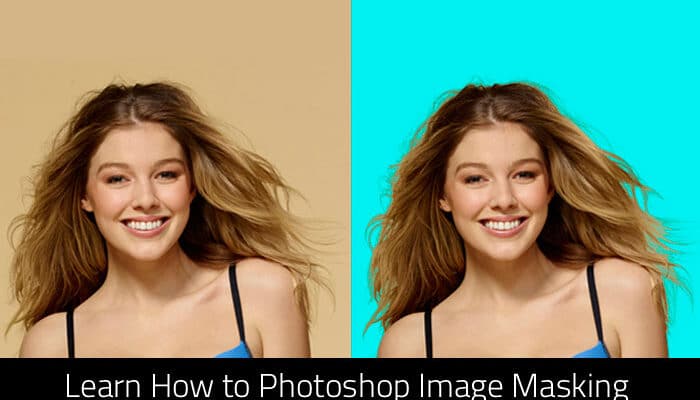
Graphic designers must learn Masking. This guide is for those who are unsure about image Masking and how to do it. Today, we’ll focus on image Masking in Photoshop.
What is Photoshop Image Masking?
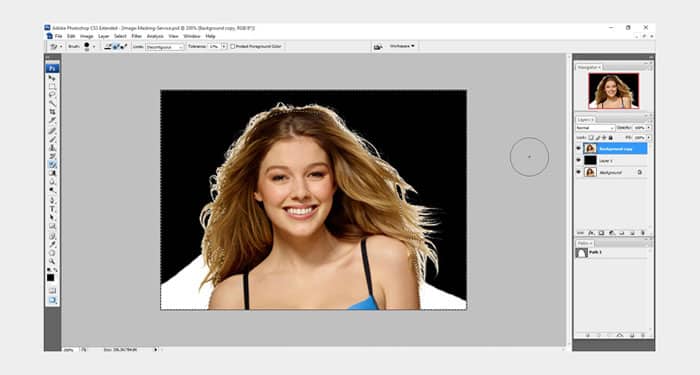
The technique of masking is vital in photo editing as it helps remove image background. There are many methods of image masking however the focus is on one. Now that you have an idea on clipping path tutorials, directly open a Photoshop image.
The difference between clipping path and image masking
A clipping path uses a pen tool to outline an object for removal. Meanwhile, Photoshop image masking employs a background eraser and magic eraser tools. It also uses color separation to remove backgrounds.
Process of Mask An Image In Photoshop
Step 1: Choosing Your Selection Tool
Think of this step as picking the right tool for the job. Photoshop offers several selection tools, each designed for different situations:
Basic Selection:
Quick Selection Tool (W):
This tool acts like a free-form lasso. It is perfect for roughly outlining complex objects with irregular shapes. It’s ideal for getting a general selection to start with.
Object Selection Tool (O):
This tool is powered by artificial intelligence. It excels at selecting entire objects based on their content. It works well for clear objects, such as people or animals standing out from the background.
Precise Selection:
Pen Tool (P):
This tool offers the best precision. It’s for creating detailed paths around objects with intricate edges, like hair or fur. It requires more practice but gives you the most control over your selection.
Magnetic Lasso Tool (M):
This tool “snaps” to the edges of your object. It is perfect for clean selections with clear borders. It’s a good balance between ease of use and accuracy.
Step 2: Making the Initial Selection
With your chosen tool, roughly outline the object you want to isolate. Don’t worry about perfect accuracy at this stage. You can always refine it later using the tools we’ll discuss next.
Step 3: Refining Your Selection
For a cleaner cut, consider using the Refine Edge Brush Tool:
- Click the “Refine Edge Brush Tool” (located next to the Quick Selection Tool).
- Use the brush to paint over areas you want to include or exclude from your selection. This is helpful for capturing fine details. For example, hair strands or fur textures.
Step 4: Feathering the Edges
Before making the mask, you can soften your selection’s edges. Do this using the “Feather” option in the selection bar. This makes a smoother transition between the masked area and the background. It greatly helps objects with soft edges, like feathers or foliage.
Step 5: Creating the Mask
Click to “Add layer mask” button at the bottom of the Layers panel. This creates a mask. It hides everything outside your selection. This lets you edit the object without changing the original image. Think of it like a virtual cutout that lets you work on the object independently.
Step 6: Further Refining the Mask
For even more control over the masked area:
Brush Tool: Use the Brush Tool (B). Paint black on the mask to hide areas. Paint white to reveal them. This is useful for fixing imperfections. It is also useful for adding back small sections. They might have been accidentally excluded.
Channels Panel: Use the Channels panel (Window > Channels). It creates complex masks based on color or tone in the image. This allows for precise masking. It’s based on specific traits, like isolating a red thing from a green background.
Step 7: Layer Masks with Adjustment Layers
Once you understand masking, layer masks with adjustment layers unlock powerful editing options.
Targeted Adjustments:
Apply adjustment layers like Levels, Curves, or Hue/Saturation only to the masked area. This lets you adjust the color or tone of the isolated object. It won’t affect the rest of the image. Imagine making a person’s smile brighter. Do so while keeping the background untouched. Or change the color of a thing without changing what’s around it.
Non-destructive Editing:
Layer masks offer a non-destructive way to edit. Changes made with adjustment layers affect the mask itself. They do not affect the image pixels. This means you can always go back and adjust the mask or the layer. This won’t change the original image data.
Step 8: Vector Masks
For precise and scalable masking, consider using vector masks:
Sharp Edges and Repetitive Patterns:
Vector masks work best for objects with sharp edges or repeating patterns. These include logos, geometric shapes, and clean-cut clothing. Pixel masks are unlike vector masks. Vector masks are based on math. This lets them be resized without losing quality. This makes them perfect for situations where you need a sharp, accurate mask. It stays sharp even when scaling the image.
Flexibility and Control:
Vector masks offer greater flexibility and control compared to pixel masks. You can change the mask’s shape by moving the anchor points or adding/removing curves. This allows for precise adjustments.
Step 9: Frequency Separation
For advanced editing needs, explore frequency separation:
- Independent Editing:
This technique separates the image’s texture. Texture is details like skin texture or hair strands. It separates texture from the image’s color and brightness. This allows you to edit these components independently. For example, you could change the color of someone’s clothes. It would not affect the skin texture. The same goes for changing the skin texture without affecting the color of the clothes. - Selective Enhancements: Frequency separation empowers you to make selective enhancements. You can sharpen the texture details while keeping smooth color transitions. Or, you can adjust the overall brightness without affecting the fine details.
This is just one among many methods of photo masking that you can practice to perfect. It is possible to do your photoshop image masking with the help of masking components and Photoshop software.
Remember, mastering these advanced techniques takes time and practice. Experiment with different combinations and explore online tutorials for further in-depth learning. With experience, you’ll discover more creative options. Also, your image edits in Photoshop will become more precise and impactful.
Mastering Masking in Photoshop
Masking is a key Photoshop technique. It lets you edit an image without changing pixels permanently. It’s like using a magic eraser that you can undo if you make a mistake.
Masking is used in many photo tasks. It’s used for creating photo composites and isolating objects for background removal.
Types of Masks in Photoshop
There are three primary types of masks in Photoshop:
Pixel Layer Masks:
These masks allow you to control the transparency of individual pixels in an image. You can paint the mask black or white. This hides or reveals parts of the image.
Clipping Masks:
These masks cut the content of one layer into the shape of another. They are often used to insert an image into a shape. For example, to place a logo on a button.
Vector Layer Masks:
These masks use vector shapes to control image transparency. They are precise and scalable, ideal for objects with hard edges.
Why Masking is Important
Masking is important for several reasons:
Non-destructive Editing:
Masking lets you alter images without deleting pixels. Thus, you can easily undo your changes.
Precision Editing:
Masks let you control which image parts you edit. This is key for tasks like isolating objects or removing unwanted elements.
Creative Effects:
Masking can create many effects. These include photo composites, double exposures, and selective adjustments.
Basics of masking:
Many blogs discuss basic masking in Photoshop. But here are some extra tips that you may not find elsewhere:
Using Adjustment Layers with Masks:
You can use adjustment layers with masks. You can make precise edits to an image in specific areas. For instance, you can brighten a portrait’s shadows with a Levels adjustment layer and a mask.
Creating Custom Brushes for Masking:
You can create custom format of brushes in Photoshop. Then,add textures or patterns to your masks using those. This can be helpful for tasks such as creating realistic-looking hair masks.
Using Refine Mask:
The Refine Mask tool in Photoshop can help you make better masks. This is especially true for complex objects.
Conclusion
Masking boosts your Photoshop skills. Learn its types and uses for better photo edits. You couldn’t make these with traditional techniques.


