
You might have heard about the Magic Wand Tool, which is definitely a stunning tool for removing backgrounds from images in Adobe photoshop. Did you know ? Adobe showed that over 60% of Photoshop users utilize the Magic Wand tool regularly. According to another survey, the Magic Wand tool is ranked as the third most used selection tool in Photoshop. Let’s discuss about the magic wand tools.
What is the Magic Wand tool used for?
Magic wand tool offers you the easiest way to select and clipping mask certain areas of an image in order to remove the backgrounds. Plus, it doesn’t affect the remaining areas and only removes the selected parts. To improve the overall appearance of an image to be used on ecommerce platforms or other websites, magic wand comes in handy. It selects an area of solid color within an image whichever you want to delete and then removes all the similar color from the background.
The work principle is given:
- Changing the background of an image
- Selecting solid-colored objects for editing or deletion
- Creating masks for selective editing
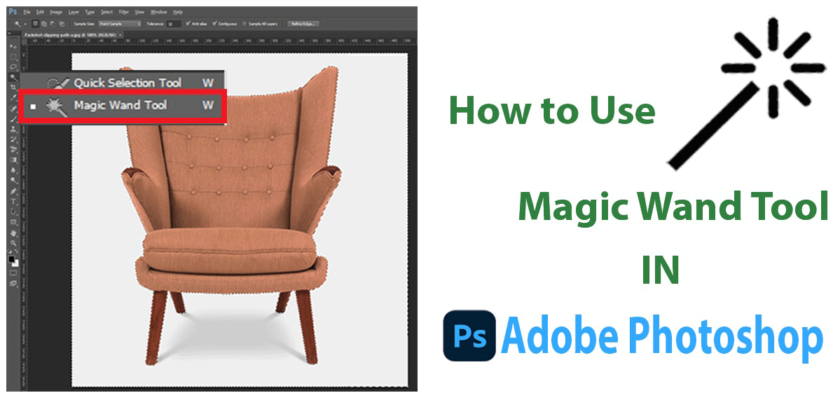
How to use the Magic Wand in Photoshop.
The Magic Wand tool in Photoshop might seem like fantasy but it’s a real time-saver. It’s great for isolating objects in images. Here’s a simple guide on how to use it.
Step 1: Prepare Your Image
Open your image in Photoshop.
Duplicate the background layer. This step creates a backup for restarting. First, right-click the “Background” layer in the Layers panel.Then, choose “Duplicate Layer.”

Step 2: Unleash the Magic Wand
Locate the Magic Wand tool in the Toolbar. It usually looks like a magic wand icon. Sometimes, it might be hidden within a flyout menu under the Quick Selection tool.

Step 3: Mastering the Tolerance
This setting determines how closely matched colors need to be for selection. Here’s the key:
Tolerance setting:

It is the number to select how closely you want to choose the color to remove from the background. This is between 0 and 255, the more the value, the more area it will select to remove. If you choose 0, the magic wand tool will select only the color that is exactly the same which you have clicked on. Putting 255 in the value will select the whole image which might not be of any use if the background is of different colors. Make the tolerance somewhere around 20 to 30 to get the results right.
Higher Tolerance (30):
This grabs a wider range of similar colors to your click. It might grab unwanted areas. Ideal for backgrounds with minimal variations.
Lower Tolerance (10):
It creates a more precise selection. But, it might miss subtle color shifts in the object you’re isolating. Perfect for intricate details.
Step 4: Contiguous Selection
It is the option to select only the pixels with suitable color information which are directly related to the original selection. This option controls how the Magic Wand hunts for similar colors:

- Unchecked: Selects all pixels within the tolerance range, regardless of connection. Useful for objects with scattered elements of the same color .
- Checked : Selects only connected pixels with similar colors. This helps avoid accidentally grabbing parts of the background. They have a similar hue to the object.
Step 5: Click with Confidence

Target the background: Click on a solid area of the color you want to remove to isolate your object. The Magic Wand will lasso nearby pixels. It picks ones within your tolerance.
Step 6: Refine Your Selection for Perfection

The Magic Wand might not capture everything perfectly. Here’s how to achieve surgical precision:
Add to selection:
Hold down Shift. Then, strategically click on more areas of your object that you want to grab.

Subtract from the selection:
Hold down Alt (Option key on Mac) while clicking on areas you want to exclude. These are stray background pixels that were accidentally caught.
Refine edges with other tools:
Use the Quick Selection tool for broad areas. Use the Refine Edge tool for edge adjustments.
Step 7: Banish the Background
Once you’re happy with the selection, it’s time to make the background disappear:
Hit Delete or Backspace:

This sends the selected pixels (background or unwanted area) into oblivion.
Step 8: Deselect
After successfully isolating your object, you might want to deselect it. Go to Select > Deselect. Or, press Ctrl+D/Command+D. This will clear the selection.
Edit > Clear or Fill:

Choose “Background Content” to replace the void. You can use a solid color or a captivating pattern to create a dramatic effect.
Follow these steps. Understand the Magic Wand tool’s functions. Then, you’ll be well on your way to isolating objects precisely. You will also be transforming your images in Photoshop.
I hope you understood the process pretty well. This is fun using Photoshop tools for different issues and as you use them, you will discover many new things. If you happen to do anything wrong, press Undo button to undo the last step! Have a good day.
Remember, practice makes perfect! Try different tolerance levels. Also, try the Contiguous option. See what works best for your images.
Advanced Magic Wand Techniques
The Magic Wand tool is simple to use. But, there are advanced techniques. They can help you make more precise selections.
Feathering: Feathering the selection (Select > Modify > Feather) softens the edges of your object. This creates a smooth transition between it and the new background or the rest of your image. It adds a touch of realism to your composition.

Anti-aliasing: This is to smooth the jagged edges of a selection. It softens the color transition between the background pixels and edge pixels. When you cut, copy or paste the selections, this is useful.
Use the Shift and Alt keys: Use the Shift key to add to your selection and the Alt key to remove from it. This method is useful for complex selections. Just click several times with the Magic Wand tool.
When to avoid the Magic Wand tool:
The Magic Wand tool is powerful but not always the best choice. Here are some situations where it might not be suitable:
- Images with complex color variations or gradients. The Magic Wand tool may struggle to select the desired area accurately in such cases.
- Images with fine details or small objects. The Magic Wand tool’s selection may be too imprecise for these scenarios.
In such cases, you may want to consider using other selection tools in Photoshop. These include the Lasso tool and the Pen tool. They offer more control over selection.
Benefits of using the Photoshop Magic Wand tool?
Are you used Photoshop’s Magic Wand tool in ever,? This tool not enough good but It can save time. Let’s see how it works.
Click to explore.
Forget just clicking on something and hoping for the best. The Magic Wand is actually pretty smart! It use a algorithm to understand what you’re trying to grab. Click the sky, and the whole sky gets selected. Pretty cool, right?
So, What Can It Do?
This tool is powerful. It selects items by color. It’s ideal for:
- Background Blues: Need to swap out that boring background for something more exciting? The Magic Wand can help you isolate your subject with ease.
- Object Obliteration: Got an unwanted element in your photo? Select it with the Magic Wand and banish it with a click!
- Selective Editing Magic: Want to edit just a part of your image? Use the Magic Wand to create a “mask” and focus your adjustments on specific areas.
Conclusion:
The Magic Wand is a key tool in Photoshop. Understanding its features and hidden controls unlocks its full potential. Then, you can make stunning image edits. So, grab your Magic Wand, experiment a bit, and see what kind of magic you can create!