How to Choose the Best clipping path service provider Company
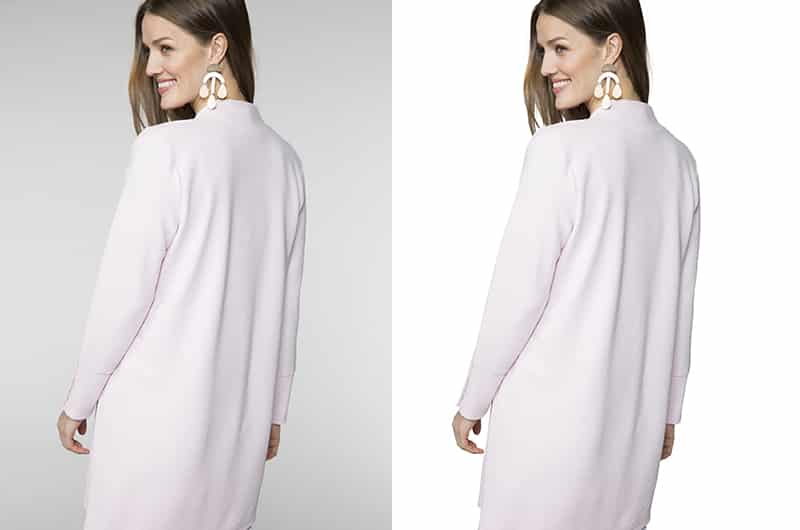
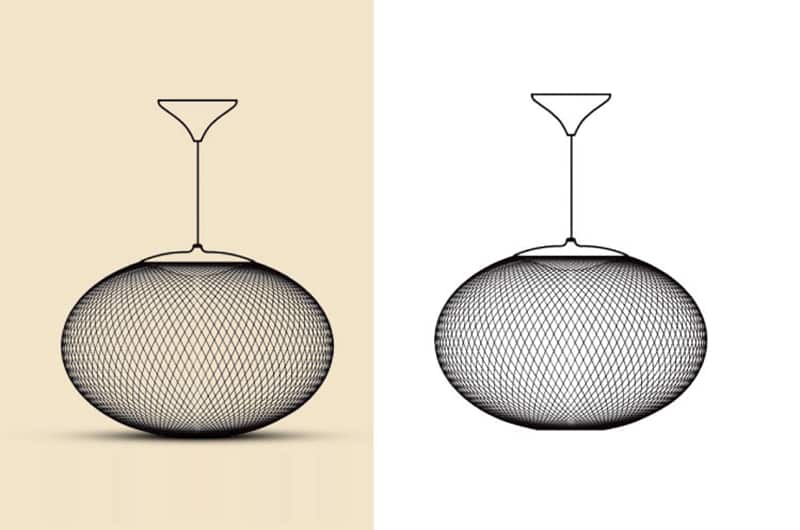
Clipping path, as you may know, is a service that use to cut out images from their respective backgrounds. This technique is available in Photoshop allowing you to draw paths around an object. Then cut out it to place a new background.
How clipping path is used for the eCommerce world?

When it comes to displaying products on online selling portals. It is very important that they look attractive to lure the viewers. Since the major purpose of using a clipping path is removing the background. The product images will make it look stunning. You can click product images against a white background but if you already have the images and the background is of another color. Use a clipping path to remove the background and place the object on a new backdrop. Also, the clipping path method is known as etching, cutouts, and deep etch.
Should you outsource to a clipping path service?

You should outsource to a clipping path service provider if there are a lot of images to clip. Since an eCommerce portal has hundreds of images, outsourcing would be a great idea. The clipping path agency makes sure to deliver excellent results as they have the latest technology and tools. Clipping path or cut out is a time-consuming process that also involves professional skills so to give them desired look, outsourcing is a must. A lot of zooming and clicking is required in the clipping path technique which you can perform once, twice, or thrice but working on hundreds of images is not possible. Simply outsource the work and focus on other important areas of your business to generate more revenue and earn more profits. There will be a waste of money and time too.
What is the cost of the product photo clipping path?
When choosing a clipping path service provider, there are a lot of things that decide the costing factor. It all comes down to the price per image and then the total cost will calculate. Furthermore, to save time and effort, it is important to hire a clipping path service company that makes sure to deliver excellent results. Choose the company wisely and consider all the costs before hiring anyone. If the cost suits you, go ahead with these questions:
- How much experience do they have?
- What is the turnaround time?
- How many clipping paths they have drawn to date?
- How many satisfied clients do they have?
- Will you get quality work?
- What are the modes of communication available?
If the answers to all these questions are satisfactory, you are good to go ahead. Let us discuss a few points in detail:
Is the Clipping Path hand-drawn or automatic?

When it comes to drawing clipping paths, every image has a different requirement. Yes, there is a lot of software available in the market today which can make clipping paths in a perfect manner but you need to decide whether you want a manual clipping path or an automatic one. If you are dealing in a footwear store, a manual clipping path is what you need to get accurate results. No doubt, automatic clipping paths are easy but it all depends on the image requirement. Automatic removals or clipping of the images is done using a magic wand or background eraser tool which works best with simple and high contrast images. On the other hand, a manual clipping path provides the best results as the paths are drawn very carefully to deliver smooth edges.
The best clipping path service agency is that which allows you to choose between hand-drawn and automatic clipping paths. Plus, it is easy to manage cost and quality when you get to choose the type of clipping path for your images according to the requirements.
How will the images be back?
You definitely need the edited images back in any form to use them further for your website or social media accounts. In eCommerce, the clipping path holds a major place and this service never goes obsolete because you need to clip the images frequently before uploading them on the website. Whenever any new product will add, it has to undergo the whole clipping path process. So it is essential to get the images back in less than 24 hours at the click of a button. The best clipping path company makes sure to deliver the end results in 3 hours or less. Also, the final images must be in different formats or be made available in a variety of ways like API, web, or FTP. There should be categories and subcategories for the batch of images so make sure if the company is sending you the images that way.
Are the services of good quality?

Quality assurance is of much significance when it comes to clipping path services. If the path is not satisfactorily drawn, the end results might ruin the overall appearance of your portal. Plus, it is important that you get revisions and corrections from the company if the need arises. For example, if you think that the images are not what you want, you can ask them for corrections and the best company is that which gives after assistance. Plus, make sure to check whether or not you can get a trial to assess their skills. Also, if you can review the work done. Suggest the changes and if you don’t like them, you can reject the images and ask them to do it again.
Communication methods available

When it comes to outsourcing clipping path services. It is really essential that the company provides the best method of communication. Of course, you have to contact them for your needs or requirements which are only possible if they have the right mode of communication. Plus, you cannot wait for days to send your queries and have them solved. A reputed company offers email, phone, and chat support to help customers whenever they want. When you hire a company, don’t just look at their skills and professionalism but also how they communicate. It will really help you narrow down your choices and make you understand how reactive the company is when it comes to assistance.
Who are they working with?
Since photography is a wide business, you can expect the amount of work the photo editing companies are getting. When you choose any company, don’t forget to check their previous customer testimonials. It will show you the satisfied and happy customers that the company already has under its court. Because the needs of every business owner are different, checking the testimonials will be beneficial as you will get to know the diversity of work a company has handled. Whether it is wedding photography, baby photography, or lifestyle photography, editing is different for each. The best company is that which is capable of handling all these genres pretty well and professionally.
However, make sure to see which brands the company is working with. What is the satisfied client ratio, and are the customers happy with the work. If you are looking for the best and reputed clipping path service provider, do consider www.clippingpathking.com to fulfill your requirements.
- Published in Uncategorized
Image Masking With Photoshop
Image masking refers to a process of manipulating image pixels and background to enhance quality. Adobe Photoshop provides sophisticated features for Image masking and manipulation. For instance, the clipping path technique is purposely for extracting the image from the background pixels by creating a path around it. Photo masking technique used together with clipping path method can make image swapping between different background themes.
Soft and hard edges of an image such as hair strands, furry clothes, dolls and any other object can be manipulated and customized to client preferences and taste. These images rendering facility is made possible courtesy of the unique photo masking and clipping path techniques. These two techniques complement each other in image masking with clipping path technique purposely for a hard edge and photo masking for a soft edge category. The latter can also be used where the clipping path method has failed to render the required outcome. This is common where there is a need to isolate the image before masking takes place. Image edges are not limited to the two categories of hard and soft. Another form of images such as lost edge and sharp edges can also be manipulated with other tools that can be found in adobe Photoshop. Image masking with Adobe Photoshop provides pen tablet which can be used for blending between soft and hard edges. It can also be used with lost edge images to isolate the image from the background in cases where the color themes are close.
Please Free Test-2 images for a first-hand experience on our image masking service in Photoshop.
Layer Masking:
Layer masks can be used to redefine background transparency levels in shades of white, gray or black. These can be done for either a specific or grouped layers. These renderings are made possible with the help of a pen tablet. We price differently based on task complexity and time constraints.
Alpha channel Masking:
All objects separated from the background are saved, edited to conform to the required them using alpha channel masking. The photo file is then resized before uploading or downloading takes place. This method is suitable for single color background images.
Hair & Fur Masking:
Isolate hair & fur images from background pixel with the help of pen tablet for soft edge or any other tool. Photo masking works better than clipping path technique in achieving this. You can go ahead and edit the image to your preferred taste in terms of color, brightness, exposure, etc.
Refine Edge Masking:
Pick an image using the Quick Selection tool in Photoshop with the help of this facility. Apply Layer Mask of your choice and use the Radius tool to redefine the image edges to soft. This automatically renders the soft edge images making them not only to appear more natural but original as well.
Transparent object Masking:
These techniques enable you to redefine any glass or transparent object with 0% to 5% opacity, e.g., car glass, spectacles, bottle, water. Use it to retain or redefine your current theme.
Translucent object Masking:
This technique will enable you to manipulate translucent objects which are 5% to 100% opaque, e.g., frosted glass, bridal veil, paper, plastic bottle, Sunglasses, plastic bottle, etc.
Unsuitable image parts are picked with the quick selection tool and removed by layer masking. Object masking is useful for removing deformities from an image.
Color Masking:
These features enable a designer to do retouching, color, exposure and even corrections to images. It can be used to remove hollow lines and printer scratches on scanned photos. It enables a correction to pixels for clear images.
- Published in Image Masking service
Clipping path and Uses
Clipping path
The another name of clipping path is deep etch. It means a closed vector path or a shape what is used to cut out an image in photo editing software. The inside section of the path will be included and outside of the path can be omitted from the resultant image.
See an example image where we have shown the process of clipping path. Selected part will be included and outside of selected path will be omitted from the resultant image.
Clipping path service is very important for any other photo editing work like image masking, Image manipulation, Neck joint, Color correction, Background remove service.
Now we will Describe Uses of clipping path
Clipping path Is vastly used in digital photo editing studios. In Every need of Photo editing or image selection, it’s so important to use clipping path.
The uses of Clipping path in Photo editing studios:
1. Remove Background from image: For removing image background clipping Path is occupied because For omitted the background the subject is to be selected and the outer part would be deleted and the main subject will be set in the selected background. an example is shown.
2. Color Correction: For changing color of a part or the full section of the image section need to be select for making selection clipping path is imposed.
3. Photo Retouching: For retouching Clipping path service is mostly used selection need to be made.
6.Shadow creation: Multiple layer Need to be made for this service. For making multiple layer on the selection clipping path is imposed.
- Published in Photoshop
Define clipping path service and its importance
Clipping path service
Definition of clipping path: clipping means clip something for setting it on desired place or remove something unwanted things from the whole image. clipping path service is used for all kinds of photo editing service like image masking service, For image masking service at first need to create clipping path after that we can make it masking for removing background of that images.
Clipping path service is so important for any service we can do that with skilled hand. we have many skilled workers who create path carefully.
Why clipping path service is so important:
Now we will describe why this service is so important. as one person send us a car image for editing. like he wants to remove the car background. For starting the work at first we need to select the whole car with pen tool we can do it with magic tool but manual clipping path is done by the pen tool as its so authentic and it can create very clear path where we can easily use for any method. after select we can delete the background of this image easily by following some process.
Why photo editors like clipping path Service:
Every photo editors like clipping path service. for each option of work is needed for completing the whole work but mainly clipping path is must.
Do i need to use clipping path on retouching:
Simple question and simple answer yes of course we need to use clipping path service on photo retouching as for retouching we need to select special part of a image without clipping path we can not able to select that.
- Published in Image, Image Masking service, Photoshop
Make a wonderful Grass Text event in Adobe Photoshop with your own Text easily.
Adobe Photoshop tutorials Part: 01
At first run your Photoshop application in your won pc and practice yourself with this tutorial and I think if you read my tutorials, must you can do it yourself.
Step 01: Take a new page from the above left first menu “file” of adobe Photoshop or keyboard shortcut:”CTRL+N”
Step 02: and set width = 700 px, Height=500 px and resolution =300 with white background from new page windows then click OK. If any confusion please see the bellow image for practical work.
Step 03: Now select Brush tool from left tools box .if any problem to do please see the practical image view.
Step 04: then open the brush preset picker above tools Brush tools option. see the bellow image if fill confusion.
Step 05: After open Brush presser picker windows set master diameter above 100 PX or better 135 px and select grass event.
Step 06: Select a Grass color as you want to make your event grass and press Ok. See the practical in bellow image.
Step 07: Now it’s ready for Drawing .so drawing yourself, just click any field or move your muse cur sap with on click and see your dream drawing is ready thank you every one.
- Published in Uncategorized
Adobe Photoshop tutorials-part: 02
Create a beautiful Text effect event with your own Text on a image in Photoshop easily.
Hello everyone .How is you? Today I am going to present you an Interesting Photoshop tutorial for making a beautiful text effect event within 1 minute.
This is my best one and interesting Photoshop tutorial in this blog and I will be writing more one by one if you are benefited by my writing Photoshop tutorials. If you love this tutorial please write a comment about this tutorial, how it is?
Let’s going to start today’s Photoshop tutorials part: 02 step by step. Please read and practice yourself and enjoy this tutorial. if you are benefited by this tutorials then I fill happy and I will writing more for you.
In the beginning open your adobe Photoshop application /tool and go to open file option then select your image file and open in adobe Photoshop.
Step 01: select the horizontal type tool (T) from right tools box and type your favorite word or sentence with Arial Red font.
Note: If fill any confusion let see the bellow image in Photoshop practical work view
Step 02: then select Move tools and press keyboard shortcut: “CTRL+T” and resize your text big or small as you want
Note: If fill any confusion let see the bellow image in Photoshop practical work view
Step 03: again click Move tools and select actions tools box from windows above option. Or keyboard shortcut:”ALT+F9”.
Step 04: select the Text Effect option from above option section of action tools box.
Note: If fill any confusion let see the bellow image in Photoshop practical work view
Step 05: then select text effect sub option Clear Emboss from Action tools box.
Note: If fill any confusion let see the bellow image in Photoshop practical work view
Step 06: then click the play button of the bellow option of action tools box and see your text effect event is ready.
Thank you for your participation if you are benefited by this tutorial and see any mistake please gives a comment bellow
- Published in Hair Masking, Image, Image Masking service